Tuesday, April 06, 2010

No Guilt Brownies

Every time I make Espresso Brownies for friends, they're a hit. Caffeine and chocolate together in one rich, dense, perk-you-right-up sweet bite--of course they're good. They are easy to make and freeze beautifully. They're ideal with a cold glass of milk. They've been in my repertoire for a few years now.

And yet.
I've never written about these brownies on this blog. I think I was hung up on a sort of embarassing aspect to the recipe. You see, it calls for... oh man, here we go: boxed brownie mix. There. I said it. Duncan Hines Chocolate Lovers, Triple Chocolate Decadence, Betty Crocker Supreme Brownie... take your pick. But to make these delicious brownies, you start with a box of premixed brownie batter. And you know what? I'm okay with that.

I haven't made slice and bake Tollhouse cookies in at least 10 years, and on the rare occasion that I bake a cake, I do it from scratch. Brownies? I have some excellent recipes that have never failed me. But Espresso Brownies, with their 19.8 ounces of brownie mix, are the exception. You amp them up with semisweet choclate chips and espresso powder, Cake Mix Doctor style, and then top them with an espresso glaze. They're pretty decadent.
Lose the guilt. Eat the brownies.--S

Monday, March 29, 2010

Steak and Eggs

I feel a little disingenuous sharing this recipe. It's barely a recipe. It's something anybody can make. A staple of Vegas breakfast buffets, a favorite of the protein-obsessed. But it's so delicious. I mean, look at that photo. Meaty, cheesy, oozy... I'm talking about steak and eggs.

A rib-eye steak topped with a fried egg is decadent enough. Add goat cheese and you're in gluttony territory. And what better time than the days before Easter (when we're supposed to be fasting) to tell you about Grilled Tuscan Steak with Fried Egg and Goat Cheese? Bistecca alla fiorentina, in case you didn't know (and I certainly didn't) is a t-bone or porterhouse steak grilled and seasoned with salt, pepper and olive oil. Pure and simple. And that's how this recipe starts out, though it calls for more tender (and fattier) rib-eyes. You also sprinkle some herbes de Provence (I just used dried thyme, dried basil, and fennel seeds, since I didn't have dried marjoram, savory, rosemary, or sage) on the meat.

Although I have a cast iron grill pan, I find my nonstick griddle does a great job with steaks, as long as they aren't too thick. So I fired it up until it was smoking hot. When the steaks hit the pan, they sizzled pretty awesomely, and after five minutes per side, they were medium-rare. You let them rest for a few minutes on a plate (cover them with foil, if you'd like) while you fry a couple of eggs, sunny side up, in the grease that's left on the pan (oh, yes!). And once the whites are set, you slip the eggs atop the steaks, and adorn them with crumbled goat cheese and chopped parsley.

This is a heavenly meal. We ate salad alongside it, you know, to keep up appearances. But make no mistake. The cheese melts into the runny egg, making a sort of sauce for the tender beef. It's salty and creamy and meaty and, well, just about perfect.--S

Grilled Tuscan Steak with Fried Egg and Goat Cheese

serves 4

4 (8-oz) rib-eye steaks
Salt and freshly ground black pepper
2 T herbes de Provence
2 T plus 2 t olive oil
4 large eggs
1/4 c (2 oz) crumbled goat cheese
2 T chopped fresh flat-leaf parsley leaves

1. Place a grill pan over medium-high heat or preheat a gas or charcoal grill.
2. Season the steaks with salt and pepper. Sprinkle both sides of each steak with the herbes de Provence. Drizzle with 2 T of the olive oil. Grill for 6 to 8 minutes per side for medium-rare. Remove the steaks, from the heat and allow to rest.
3. Meanwhile, in a medium skillet, heat the remaining 2 t olive oil over medium-high heat. Crack the eggs directly into the pan and season them with salt and pepper. Cook until the egg whites are set, 2 to 3 minutes.
4. To serve, place the steaks on 4 serving plates. Carefully top each steak with an egg. Sprinkle with the crumbled goat cheese. Garnish with the chopped parsley and serve.

Recipe courtesy of Giada at Home

Thursday, March 18, 2010

The Smart Cookie

Carrot cake has been my favorite cake for a long time. The warm spices, the flecks of carrot, that cream cheese frosting.... Yet I rarely make carrot cake, mostly because I can't justify whipping up a big old cake for myself and eating the entire thing. A cake isn't so easy to toss in a Ziploc bag and share with friends. It's also not a very mobile dessert. (Try eating a slice while walking about town with a cup of coffee.) Enter Carrot Cake Cookies: perhaps the most practical way to get your carrot cake fix. Yes, this is the answer to one of the more vexing issues facing dessert eaters today.

We can thank Martha Stewart's Cookies, one of the loveliest cookie books to come out in recent years, for this rather obvious yet somehow groundbreaking concept. The recipe combines a standard cookie dough with the classic carrot cake spices of cinnamon, nutmeg and ginger, carrots (obvs!), raisins, and two cups of rolled oats. Once you've transformed the dough into soft cookies measuring about two inches in diameter, you assemble the iconic cream cheese frosting (truly, I think "iconic" sums up the marriage of cream cheese, butter, confectioners sugar and vanilla) and make sandwiches out of the cookies and frosting.

Soft, sweet cookies yielding to the thick and creamy filling, easy to share with friends and nibble on while strolling around the neighborhood? That's what I call innovation.--S

Saturday, March 13, 2010

When Life Hands You Potato Starch...

A few months ago, I wrote about a new website called Eat Your Books. It's a cool idea: you create a virtual bookshelf of all the cookbooks you own, and since Eat Your Books has indexed the recipes in those books, you can search for all kinds of things. Say you're wondering which of your cookbooks have recipes for cassoulet. Or you want to make a summery seafood appetizer but don't know which book to look in. Or there's a bag of potato starch in your fridge that you don't know what to do with.

Oh, did I say potato starch? Yeah. Close readers may recall I bought it (along with a bunch of other unusual ingredients) to make some recipes out of the BabyCakes NYC cookbook awhile back. Haven't used it since. So I searched "potato starch" in my cookbooks on Eat Your Books, and what do you know? Along with a bunch of vegan recipes from BabyCakes, there were recipes for cakes from BakeWise and Joy of Cooking, as well as a recipe for marshmallows from Baking by Dorie Greenspan. Sold!

You start by getting sugar and light corn syrup to a "soft ball" stage (that's 265 degrees F) on the stove. While that's going, you sprinkle unflavored gelatin onto cold water, let it get spongy, and then liquefy it in the microwave. Whip up some egg whites, add the syrup, then the gelatin, along with some vanilla, and you've got a very pretty meringue.

Here's where the potato starch comes in. It's like a powdery buffer that keeps the marshmallows from sticking to everything. You sprinkle it over a parchment paper-covered baking sheet, pour in the marshmallow mixture, and then top it off with more potato starch. Three hours later, you cut up the marshmallows and toss them in more of the stuff, which is similar in consistency to cornstarch or powdered sugar.

I probably should've made the marshmallows a bit thicker, but I'm still satisfied with them. They're light and springy, and don't taste at all like the plastic-y ones that come out of a bag from the supermarket. Oh, and in case you were wondering? Nothing like potatoes, either!--S

Saturday, March 06, 2010

Sweet Sustenance

One of the marvelous things about having a baby is all the visitors who come by to see the little one. Our month-old wonder is used to being passed around from aunt to grandmother, coworker to friend, neighbor to cousin--which is so wonderful to see. But, you know, oohing and aahing over tiny fingernails and ears is hard work. I've got to offer all the well-wishers some sustenance. Granted, many of them come bearing edible gifts, but I've been stepping up my efforts, too. The latest baby-holding fuel I've made? Braided Coffee Cake with Cardamom.

Unlike some coffee cakes, this one isn't chock full of butter, sugar, chocolate or sour cream (though I have nothing against those decadent delights). Nope--it has just one stick of butter and a half-cup of sugar, as well as three egg yolks and a half-cup or so of milk (I used 1%). What gives this cake--it's actually more like a bread--its character is the warm and toasty taste of cardamom. I always thought of cardamom as an Indian spice (Tamarind's basmati rice, loaded with whole cardamom pods, is divine), but apparently, it's common in Scandinavian baking, too. It lends an almost floral aroma to this otherwise simple bread.

The other lovely thing about this bread? It's braided--which not only looks pretty, but isn't even hard to do. Topped with a smattering of chopped pecans and cinnamon, this is one sweet-smelling, and sweet to look at--baked treat. Almost as sweet as holding a certain tiny little someone.--S

Braided Coffee Cake with Cardamom

Makes 8 or more servings

3 c flour, plus more for rolling the dough
1 1/2 t instant active dry yeast
Pinch of salt
1/2 c sugar
1 t ground cardamom
8 T butter, plus more as needed
3 egg yolks
1/2 to 1 c milk, as needed
1/2 c walnuts, pecans or almonds
1 t ground cinnamon

1. Combine the flour, yeast, salt, 1/ c sugar, and the cardamom in a food processor and pulse to combine. Add 6 T of the butter and the egg yolks and pulse again until well combined. With the machine running, drizzle about half the milk through the feed tube. Process just until a dough ball forms, adding a little more milk if necessary, then stop. Knead a little by hand, until the dough is smooth (add a little flour if necessary), then form the mixture into a ball and place it in a buttered bowl. Cover with plastic wrap and let rise in a warm place until about doubled in bulk, 1 to hours.
2. When the dough is ready, cut it into 3 pieces. On a floured board, roll each piece into a long rope just over a foot long. Braided the pieces, pinching both ends to seal. Put on a buttered cookie sheet, cover with plastic wrap, and let rise again for about an hour.
3. Preheat the oven to 375F. Chop the nuts and combine with the remaining 2 T butter (you can do this in a small food processor, but be careful not to pulverize the nuts) and the cinnamon. Brush the dough with a little milk and sprinkle the nut mixture over it.
4. Bake for 25 to 35 minutes, or until a toothpick inserted in the center comes out clean. Cool, then slice and serve.

From The Best Recipes in the World

Sunday, February 28, 2010

The Danny Meyer Marathon

In 2006, Spoon interviewed pioneering restaurateur Danny Meyer for a story about his book, Setting the Table. At the time, Meyer's empire included seven New York City restaurants, including his flagship Union Square Cafe, Eleven Madison Park, and Gramercy Tavern. Today, his menu includes 12 establishments, from the gleaming bar room at the Museum of Modern Art, to hamburger heaven Shake Shack, and the impressive new Italian trattoria Maialino. So when Spoon & Fork guest bloggers Laura and Patrick, better known as Fillet Knife and Butcher Twine, decided they wanted to do a Danny Meyer Marathon, hitting all Meyer's restaurants in one day, we were intrigued.

For any other restaurateur, the feat wouldn't be either as impressive, or as fun. Just the the thought of a Jeffrey Chodorow marathon, for example, makes one's head spin. Chodorow's restaurants are too theme-park, too inconsistent, and too, well, corporate. But Meyer, even while rolling out a host of new restaurants in a very short time, has never forgotten the key ingredient in any restaurant's recipe for success: hospitality. From Fork's first meal at Union Square Cafe some 20 years ago, to a recent lunch at Tabla (try the skate), Meyer's restaurants never disappoint.

That's because Danny Meyer restaurants make sense. The menus, ingredients, and preparation are first-rate, whether at the top-rated French wonder Eleven Madison Park, or at a picnic joint like Shake Shack, where it is not uncommon for people to wait on line for an hour just to get a hot dog. The rooms are elegant, yet comfortable. And the staff are the best in the city: gracious, efficient, and warm.

So a Danny Meyer marathon also made sense, and, like the restaurants themselves, it did not disappoint. On February 27, over the course of 12 hours, from the Upper West Side all the way down to Madison Square Park, our intrepid bloggers tasted burgers and fries, shrimp corndogs, tandoori octopus, sea bass with spaghetti squash... and wait until you hear about dessert.

It was a day to remember: great food, great fun, a test of gastro-endurance, and a few twists and suprises. The full report will be up soon, don't miss it!--S&F

Sunday, February 21, 2010

Mmmm... Beer....

There are certainly worse predicaments than having your cousin, who works for a beer and wine distributor, drop almost three cases of craft beer off at your apartment in the middle of February. The shipment conveniently arrived just as I was re-introducing booze to my diet after nine months of limiting myself to half-glasses of wine, and for the first week or so, I happily dipped into our stash a few evenings a week.

Then I came across a recipe for Beer-Braised Beef with Onion, Carrot and Turnips, calling for 12 ounces of dark beer. It sounded cozy and warm and hearty--and a nice way to make the most of our recent windfall. And so I set about browning cubes of boneless chuck roast, which had been dredged in flour, salted, and peppered, in a splash of oil in my Dutch oven. The next 10 minutes were pretty much the most active part of this dish's cooking process--and that's not saying much, since the activity entailed stirring the beef around every few minutes to let each side get a little crispy. After such heavy work, I poured in a bottle of River Horse Special Ale, a cup of beef stock, some crushed garlic cloves, and a bay leaf. Then I lugged the heavy pot, tightly lidded, into a 300-degree oven for an hour and a half.

When I opened the pot 90 minutes later to slip in the carrots, I was greeted with the steamy and savory beginnings of a stew; 25 minutes later, when it was time to add the onions and parsnips, the meat was even further broken down. And after another hour had passed, the beef was completely fork-tender.

Now, this recipe comes from Cooking Light, so I shouldn't be surprised that it tells you to strain off the fat from the stew's liquid before serving. I skipped this step. I was feeling kind of lazy, and honestly, there didn't seem to be that much fat to skim, anyway. So perhaps this dish wasn't as light as it could have been. But it was awfully tasty. Over three hours, the beer and beef stock mellowed the meat into submission, and the veggies were sweet and perfectly tender, too. A perfect winter meal that I neglected to photograph (hence the pic, courtesy of CookingLight.com), but that we happily scarfed down with a salad and crusty bread. Thanks for the beer, Dan! --S

Saturday, January 23, 2010

Banh Mi: The New Black

Though they aren't quite as ubiquitous as pretzels and hot dogs, banh mi are apparently well on their way to taking over New York City. I first tasted one of these Vietnamese sandwiches--at their most basic, they consist of chicken, pork or even pate; pickled, shredded vegetables; spicy mayo; and sprigs of cilantro; all on a crusty baguette--about three years ago at Bao Noodles. Then my coworkers introduced me to Baoguette. And now I'm here to tell you about a twist on the banh mi that you can easily make at home.

If banh mi are supposedly a French-Vietnamese hybrid, then the Pork Meatball Banh Mi is an Italian-French-Vietnamese hybrid, taking the meatball sub in a very interesting (and delicious) direction. This recipe, from Bon Appetit, has you combine ground pork with chopped basil, garlic, scallions, fish sauce, chili sauce, sugar, salt and pepper (plus a sprinkling of cornstarch, presumably to help hold everything together). You form the meat into small-ish balls and fry them in a tablespoon of Asian sesame oil until they're nice and brown.

Before all that, however, you've already grated some carrots and daikon (or just use regular radishes if you can't find daikon) and set them to pickle in rice wine vinegar, sugar and salt for an hour or so. And you've whipped regular mayo into a deliciously spicy concoction with hot chili sauce and scallions.

Slice open a baguette (and here's where I think I could've used some foresight: the Eli's Bread baguette I bought was a bit too crusty; next time I'll go for a softer loaf), and pile on some meatballs, veggies and mayo. Tuck a few stems of cilantro in there, and maybe some sliced cucumber or jalapeno pepper, if you're so inclined. The combo of sweet, spicy, hot and cool is excellent. Bring on the banh mi boom!--S

Monday, January 04, 2010

Soup's On

Blustery weather and quiet January weekends call for long-simmered, warm dishes—and Pasta and Bean Soup from a new book called The Best Soups in the World (sounds suspiciously Bittman-esque, no?) by Clifford A. Wright—is just the thing. It's a twist on Italian pasta e fagioli, with white beans and small bits of macaroni joining forces with pork stew meat (I used shoulder), pancetta, fennel, chickpeas and, interestingly, a cinnamon stick.

I've been trying to plan ahead (what with Spork Jr. on the way) and have been doubling recipes when possible, so Fork and I can eat one dinner and freeze another one for later this winter when we're not so inclined to shop for food, never mind cook it. This one fit the bill perfectly, and there's already a solid quart of it in our freezer. It really is tasty, with a deeper and richer flavor than your average pasta and bean soup.

If you make this soup (and I highly recommend you do), plan on cooking it much longer than the recommended 1¼ hours—it took at least three hours for the dried cannelli beans I used (which hadn't been pre-soaked) to cook fully—and you'll probably wind up using an additional two to four cups of stock. But when it's 20 degrees outside (and "feels like 8"), few things are more comforting.

Pasta and Bean Soup

Makes 6 to 8 servings

3 tablespoons extra-virgin olive oil
1 pound pork stew meat, diced
¼ pound pancetta, cut into strips
¼ pound prosciutto skin, whole or cut into strips (optional)
1 large onion, chopped
1 fennel bulb (about ¾ pound), chopped
1 celery stalk, chopped
6 garlic cloves, chopped
10 cups chicken broth
1½ cups (about 10 ounces) dried white beans
1 cup (1/2 pound) canned chickpeas
¼ pound Parmesan crusts (optional)
1 cinnamon stick
1 bay leaf
1 sprig fresh rosemary
Salt and freshly ground black pepper to taste
¼ pound tubetti, ditali, or other short tubular macaroni
Extra-virgin olive oil for drizzling
Freshly grated Parmesan cheese for sprinkling

1. In a large pot, heat the olive oil over medium-high heat, then add the pork, pancetta, and prosciutto skin, if using, and cook, stirring, until they turn color, about 5 minutes. Add the onion, fennel, celery, and garlic and cook, stirring occasionally, until softened, 12 to 15 minutes.
2. Add the chicken broth, white beans, chickpeas, Parmesan crusts, if using, cinnamon stick, bay leaf, and rosemary, bring to a boil over high heat, then reduce to medium-low, season with salt and pepper, and cook until the white beans are al dente, about 1¼ hours. Add the pasta and cook, stirring, until they, too, are al dente, 12 to 15 minutes. Remove and discard the cinnamon stick, bay leaf, and rosemary sprig. Both the prosciutto skin and Parmesan crusts can be eaten if desired. Serve with a drizzle of olive oil and the grated Parmesan cheese.

Sunday, December 20, 2009

Stollen Moment

Of all the Christmas culinary traditions my mom has taught me--homemade biscotti, stuffed escarole, cinnamon buns--there's one that just never stuck. Despite not having an ounce of German blood, my mom loves stollen. I know, you're thinking, "What the hell is that?" Until recently, I honestly couldn't tell you much more than that it's a bread-like loaf filled with candied fruit and covered in so much powdered sugar that it almost looks like petrified wood. Mom buys herself a stollen from a bakery every Christmas, has a slice or two (my Dad, sister and I never touch the stuff) and then I guess she tosses the rest.

I started thinking about stollen this holiday season, and wondered what it was that my mom loves so much about it. I respect her taste; when she says something's good, it usually is. I looked through my cookbooks and found a recipe in The Joy of Cooking that didn't list any wacky ingredients. Pretty much a German version of pannetone, which I love. So as a surprise for Mom this year, I decided I'd make her a stollen. (Actually, I made six stollens--the recipe yield was huge. Moms going to be eating this stuff 'till July.)

I went with a recipe from a new book on artisan baking, figuring the detail would be helpful. Granted, the detail also meant I'd be involved with the project for the better part of 24 hours, but much of that time was unattended while the dough proofed. Turns out stollen's really not that complicated. It's a sweet yeast bread, with some lemon zest and cinnamon worked into the dough. It's studded with chopped bits of dried apricots, dark and golden raisins, and dried cranberries (which soaked overnight in dark rum and simple syrup; see picture above), plus some slivered almonds. It also has a ribbon of lemony almond paste running through it, a nice little surprise when you later cut a slice. I brushed each loaf with butter and sprinkled it with granulated sugar when it was just out of the oven. The recipe instructs you to then dust it with powdered sugar, but I was having visions of petrified stollen, so I skipped it.

Mom will be the real judge (since I have zero basis for comparison), but I actually think this turned out well. I toasted a slice this afternoon and ate it next to the fire as the snow swirled outside. Sure, the cozy environment helped, but I had to admit, the stollen was tasty. Heavier than pannetone, yes. But more substantial and complex, with a decent crust and a richness, thanks to the almond paste (see this rundown of international holiday sweets to put stollen in some context). I'll report back with Mom's review, so stay tuned.--S

Wednesday, December 16, 2009

A Holiday Cookie Bonanza

Last December I did some holiday baking, but was a little too preoccupied with wedding planning to jump into a full day, multi-recipe extravaganza. Not this year! Last weekend, my friend Kate and I churned out three varieties of holiday cookies in a tradition that I'm so glad we resurrected.

On the menu: one repeat from two years ago, Trios. They're just so cute, we couldn't resist. Definitely the labor-intensive entry in the field, but they're worth it. And as Kate pointed out, once you have the right tools (e.g., the right size cylander-shaped object to bore holes for the jelly; a tiny spoon to hold 1/8 of a teaspoon of jam), things go fairly quickly. Making them made me miss Gourmet's always gorgeous holiday cookie spread. I keep thinking the editors probably had their December package all ready to go when the magazine folded in October... and that it's probably lurking on some discarded computer's hard drive.

But onto the new! We went with two cookies Kate had spotted on other food blogs. First up: Sparkling Ginger Chip Cookies from 101 Cookbooks. True, Heidi Swanson's instructions are a tad on the persnickety side (come on--1/2 cup turbinado sugar for the cookie dough, and then an additional 2/3 cup fine grain natural cane sugar--sifted--for the exterior? who sifts sugar?). But I think we have to let her OCD slide here, because these cookies are fabulous. Definitely a sophisticated holiday sweet, with bittersweet chocolate, ground ginger, unsulphured molasses and grated fresh ginger. But so tasty! (They're pictured above, before going into the oven, and at the top of this post, after baking.)

The other recipe, for Maple Cookies from Simply Recipes, was a lot more straightforward. It was almost like a chocolate chip cookie in dough consistency (below) and technique, plus a nice glug of maple syrup (we used Stonewall Kitchen Grade A) and chopped walnuts. The smell of these babies baking was fantastic, so warm and delicious--like pancakes, actually. And the finished cookies? Excellent. Towards the end of the bowl, I guess the batter got a bit thin, so some cookies turned out sans nuts--which is a bit of a disappointment, because the nuts really compliment the maple flavor (and add texture, obviously). But the nut-less cookies would probably work nicely if you felt like having a maple-vanilla ice cream sandwich.

So there you have it. Happy baking!--S

Sunday, November 29, 2009

Thanksgiving Simplicity

Amid the bonanza that is Thanksgiving, a little simplicity is welcome. (Heck, after that last post, I think a no-brainer recipe is in order.) And when it comes to cranberry sauce, I know some people go to extreme measures to keep things simple. But I prefer a more homemade approach. Enter Anna Thomas' Cranberry Sauce.

I discovered this beautifully miniamlist recipe on Cookstr.com while researching a story for work, and was immediately taken with its five-ingredient list (and you only need a "dash" of one of those ingredients, so it's really more like four ingredients plus a smidge). As longtime S&F readers know, I have a bit of a sweet tooth, so this cranberry sauce's sugary tang is right up my alley. Toss in a bit of warm cinnamon and kicky cloves? Sign me up! The recipe originally appeared in Thomas' book The New Vegetarian Epicure, which sounds worth checking out, if only for its recipe for Wild Mushroom and Charred Tomato Soup (yum!).

Make this cranberry sauce throughout the fall and winter, fill your home with a citrusy/spicy aroma, and enjoy keeping things simple.--S

Monday, November 23, 2009

Spoon and Fork Take a Break, The Quest for Good Food Continues...

We interrupt your regularly scheduled Spoon + Fork blogging to bring you this special announcement: Spoon finds herself a bit busy organizing onesies, mapping out baby furniture, figuring out how to collapse this bad boy, and prepping the world for the arrival of blueberry (oh, and she looks fab doing it). And fork? Fork is battling some unfortunate jetlag after flying to South Korea to enlighten Asian bibliophiles with his immeasurable knowledge of the future of the publishing industry . Call him Chop Sticks for now. Forks are out. Chop sticks are in.

Luckily, two of S+F’s inner circle of food aficionados have taken over for the week, because you, dear reader, have been deprived since Spoon’s last post about those decadent hazelnut and chocolate buns. Enter your guest bloggers: Fillet Knife and Butcher Twine. Yes, two very underrated kitchen utensils, ones that you may own, but that are probably relegated to that lower utensil drawer amongst the Krustbuster and Bacon Genie. Yet, when it comes to the highfalutin chops of one Julia Child, these two tools should be deemed indispensable.


A little background info so you know we’re legit:


Fillet Knife and Butcher Twine (FK and BT) grew up down the block from each other. They were in the same class from kindergarten through high school, were known throughout Northeastern New Jersey for their tennis court managerial skills, and even battled each other in the annual Gingerbread Throwdown Invitational, in which BT once made a highly impressive gingerbread Parthenon and FK (along with Spoon) showed off a stirring rendition of a gingerbread tiki hut. But we digress...


One night over Checker Cabs at the neighborhood fave Almond, FK and BT discussed the recent Julie and Julia film starring Meryl Streep and Amy Adams.

“I mean, did you see that duck? That thing was crazy. Stuffed with all that….stuff….and then wrapped in dough?,” pondered FK.

“I don’t think it’s that hard,” commented BT, “I mean, I bet we could do it”.


Keep in mind neither of us owns Mastering the Art of French Cooking (for shame!), nor has either ever attempted such a feat. We’re fans of simpler, dare we say, healthier alternatives. Never ones to turn down a challenge, however, we hatched our plan.


Pâté de Canard en Croûte, is what you’d call Duck, Stuffed with Pork, Veal, Pork Fat and Then Wrapped Up in Pastry Dough in the vernacular. (Sounds prettier – and less caloric - in French, doesn’t it?)


We won’t bore you with the details, but here’s the basic synopsis of how this all went down.


1. BT expertly put together the dough ahead of time. While doing so, BT realized two things. First, Julia Child’s cookbook predates the days of Kitchen Aid mixers. And second, that Julia seemingly forgot to say when to put the eggs in the recipe. Luckily, BT inherited his mother’s baking / pastry skills and was able to correctly guess when they needed to be added to the dough.

2. FK assembled the stuffing – veal/pork/salt pork (cured pork fat), eggs, spices, and a marsala/port reduction with butter and chopped onion. (cue the music).
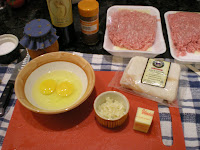


The reduction made FK smile and think of one of Julia’s best-known lines, “I love cooking with wine—sometimes I even put it in the food.”


These two steps, if ever you decide to make this dish, are best done ahead of time. Consider them your mise en place. That way, you'll feel like a Top Chef, and Tom Colicchio can tell you that your flavor profiles are spot on, you'll win a billion dollars and enough Glad plastic wrap to last you a lifetime. Since this recipe takes up a good five or six pages in the original Mastering… know that it’s a long process, and might take 4-5 hours in all.


FK and BT got together on a rainy Saturday night with the recipe, tools, and ingredients necessary. They brought their A game. Parched before they even began, BT poured a few glasses of wine.


The first step of this recipe has you bone the duck. We took Donald (a 5-pounder from the renowned Otomanelli Brothers) out of his packaging (note the funny “I’m gonna carve myself up now!” logo below)
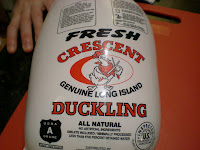


...and began the dissection dismemberment butchering.


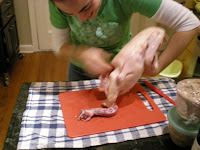
Using a very sharp fillet knife, FK and BT skillfully carved down the backbone and along the rib cage, marveling at how easily the breast meat fell away from the bone. And heavens, what fat! Those ducks obviously haven't heard of heart-healthy eating.


Navigating our way through the wing and thigh joints, however, was a bit tricky. “When you come to the ball joints connecting the wings and the second joints to the carcass, sever them,” says Julia.
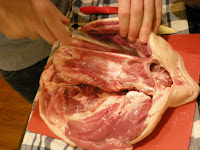

But on which side? Perplexed, we decided to wing it (pun intended), and using some nifty kitchen shears, cut the joints down the middle.


Pretty confident and proud of ourselves, we scanned over the recipe and chuckled at our favorite line of the night, “By the time you have completed half of this, the carcass frame, dangling legs, wings and skin will appear to be an unrecognizable mass of confusion and you will wonder how in the world any sense can be made of it all.”


Oh Julia, you have such a way with words.


The following conversation ensued:

BT: This whole butchering thing isn’t all that hard.

FK: (carving here, trimming there) Top off that wine glass and let’s figure out how to take the cavity out of the bird. Eww, this is so gross.

BT: I think we need to be extra careful when cutting between the skin and the breastbone. Julia says the skin is very thin and can be easily slit.

FK: I’m sure we can figure it…oh…yeah…I see…she’s right. Hmm. I don’t really know how we can cut it out without cutting some of the skin.

BT: Well, I think we already botched it when we cut a few holes in the skin to remove the wings, so we’ll just wrap it in extra twine.


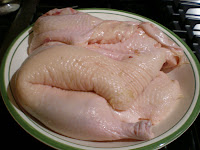
Relieved, duck cavity removed (along with the bag of undesirable organ meats, the neck, and God knows what else…), we threw it in a bowl and set it aside (looks scrumptious, doesn’t it?!)

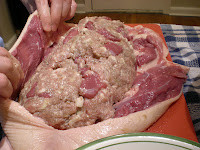
FK brought out the stuffing and BT took over, chopping up some of the breast meat we had removed, and mixed it with yet more marsala, port, salt, pepper, etc. (We think at this point, you could veer from the original recipe and add any type of herbs you like, chopped mushrooms, perhaps, even some toasted breadcrumbs if you wanted to make it less dense).

We amassed the, um, mass, and molded it into a meatloaf-shaped pile inside the duck. So far, so good. Protein inside protein inside pastry. What could go wrong?


Here is the point at which we realized a few important details:

a) our duck was bigger than the one in the recipe, thus making it heavier, and all around bulkier (balkier? No, bulkier).

b) we had a few unfortunate holes, which allowed the stuffing to kinda peek out.

But we're quick. We know the drill, so we wrapped the heck out of our duck with a lot of twine, and instead of browning it in a frying pan (maybe a paella pan would've worked, but alas, we were without one), we put it on a baking sheet and stuck it under the broiler for a few minutes, getting a little crispiness to appear on each side.
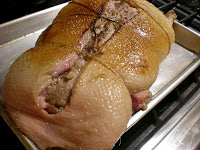


Once out of the oven, we let it cool, and BT rolled out 2/3 of the chilled dough, which we then wrapped around the bottom portion of the duck. It came up pretty far, and kinda looked like a papoose (not to be confused with capital P Papoose).
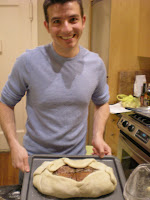

The top third was rolled out and put on top.

At this point, we were tired, but having a good time. Julia, always the consummate connoisseur of the kitchen, suggested we use the leftover dough to cut out some pretty flowers. The explanation and accompanying pictures took up almost an entire page. We decided instead to adorn our pièce de résistance with our real life initials.


The masterpiece went into the oven on a rack over a pan (enough fat oozed out to fill 1/2 coffee can. Nice!) for about 2 1/2 hours. We let the meat cool for over an hour (during which time, steam poured out of the steam hole we had put on top of the duck (per Julia) at a ferocious speed.)


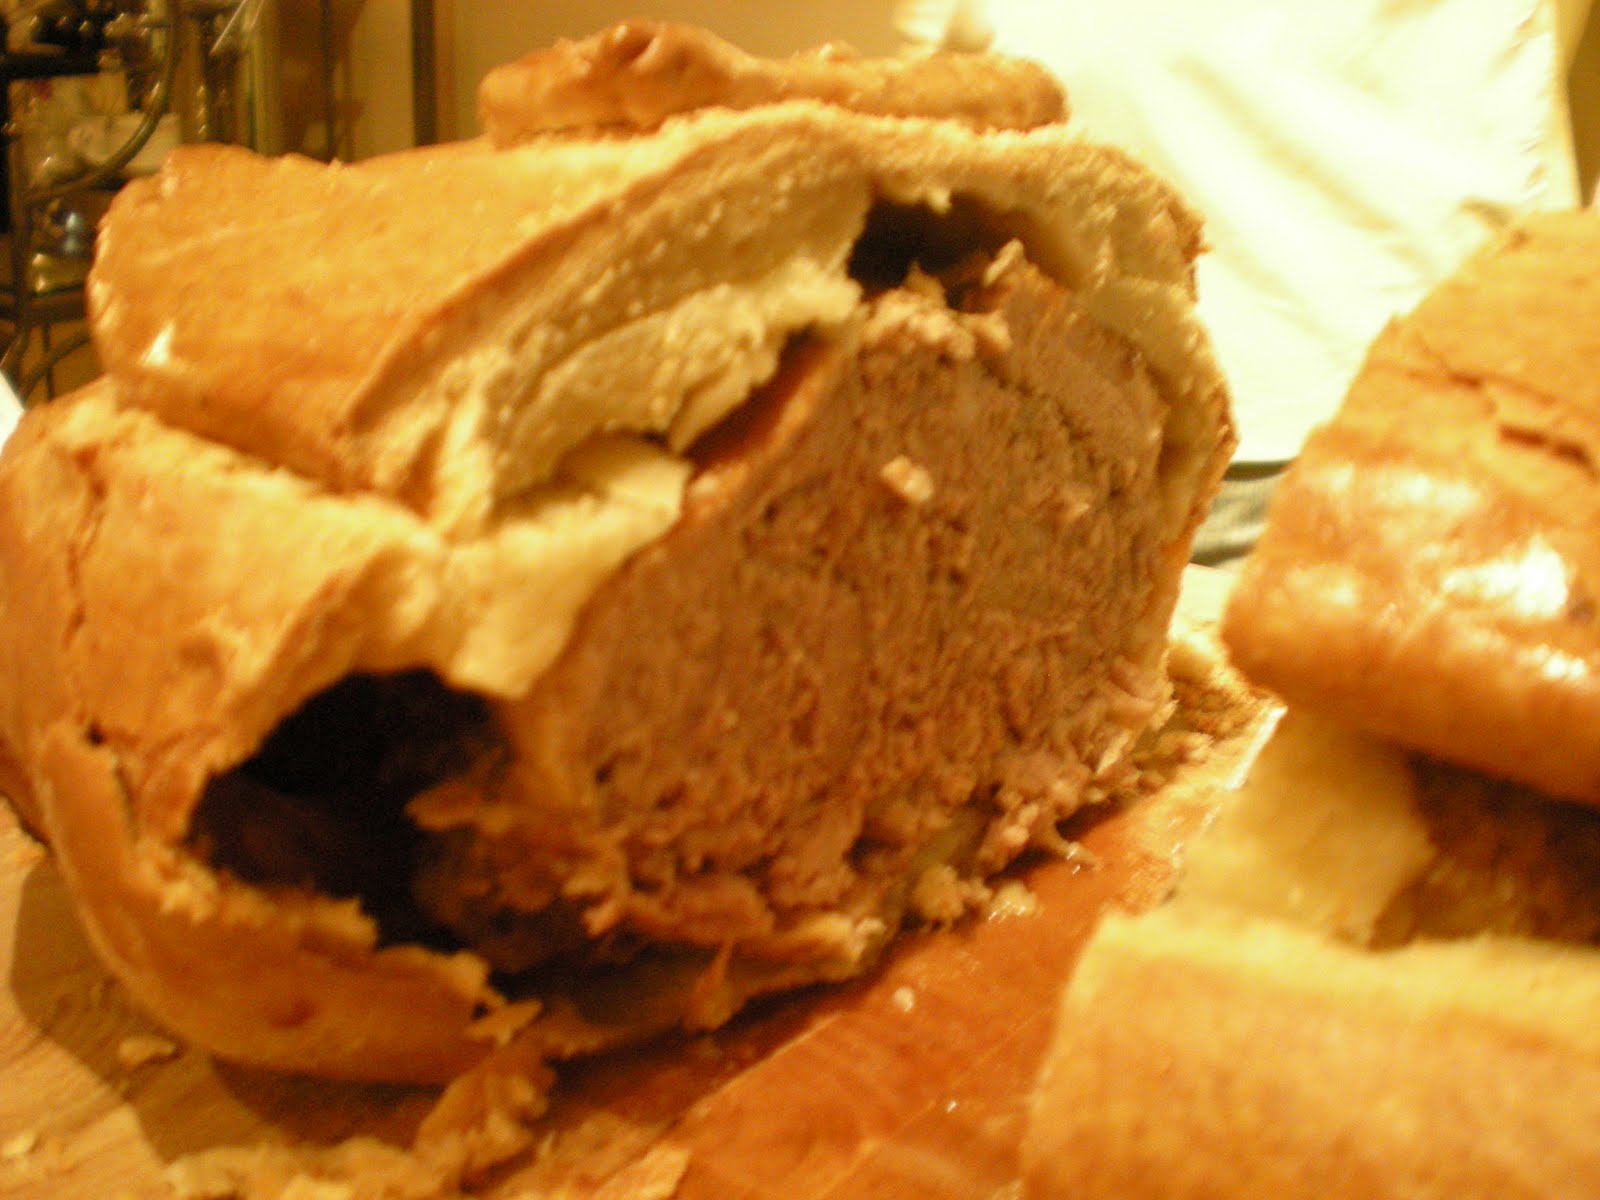
Thankfully, one very kind soul joined us for a taste. And guess what! It wasn't all that bad. It reminded FK of a very meaty, sumptuous calzone. BT thought it was similar to a fancy meatloaf wrapped in pastry dough (and since BT is a meatloaf fan, that is a compliment). The dough was crunchy on the outside, (shiny from an egg wash) hiding moist stuffing inside.


The real gem, though, was the back of the duck, the tender pieces of thigh that were hidden under layers of flaky pastry, surrounded by the stuffing.
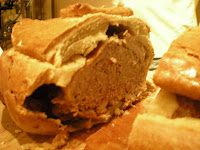

Would you whip this up on a Tuesday night? Probably not. Was it worth the 4+ hours of work? Possibly.


Did it inspire us to try a turducken? Oh yes. But it's definitely tastier than its Tex-Mex successors, the Cheesy Gordita Crunch Supreme or whatever it is they serve over at Taco Town these days.

Sunday, October 18, 2009

Better Buns

The smell of a cinnamon roll is a pretty great thing. I haven't had a Cinnabon since high school, but whenever I pass a shop at a mall or a highway rest stop, the sweet, yeasty aroma tempts me (and then I walk on by, knowing that three bites in I'll feel stuffed and sugared into a coma). Even though Chocolate and Hazelnut Buns don't have cinnamon in them, this morning, they filled our apartment with that delicious, bready, buttery scent. It didn't hurt that it was cold and rainy outside, so our home, with the scent of the buns plus a freshly brewed pot of coffee, was a pretty heavenly place to be.

Okay, enough olfactory descriptions. The recipe for these rolls comes from a forthcoming cookbook on baking around the world, and is a nice twist (ha) on the traditional cinnamon bun. Instead of lacing the buttery dough with cinnamon, you use a blend of finely chopped hazelnuts, cocoa powder and sugar. Other than that, things are pretty straightforward: make a dough from flour, yeast, sugar, salt, melted butter, an egg and lukewarm milk. Knead, then let it rise. Roll it out into a big rectangle, spread it with butter and top that with the filling. Then roll the whole thing up, slice it and pack each bun into a baking pan. And get ready for some mighty fine smells to come out of your kitchen.

The rolls are very good, not too sweet but perfect with coffee. I'm not sure how they'll taste at room temperature, but five minutes after baking, they're pretty perfect. And much better than a Cinnabon.--S

Chocolate and Hazelnut Buns
Makes 9 buns [I got 9 large buns and 3 mini buns out of the recipe]

Dough
2 1/3 c white bread flour
1 1/2 t active dry yeast
2 t sugar
1/2 t salt
1/2 stick butter, melted and cooled [I used unsalted]
1 egg, beaten
About 2/3 c milk, lukewarm

Filling
2/3 c hazelnuts
1/3 c granulated sugar
1/4 c cocoa powder
1/2 stick butter, very well softened

1. Place all the ingredients for the dough in a large bowl and mix to moisten the dry ingredients. Use a heavy-duty mixer fitted with a dough hook to knead thoroughly until smooth and supple. Alternatively, turn out onto a floured surface or a non-stick silicone mat and knead until smooth and supple. Bring together in a ball and return to the bowl. [I used a plastic bowl because I've heard dough doesn't rise as quickly in a metal bowl.] Cover the bowl with plastic wrap or a damp dish towel and set aside in a warm, draft-free place until doubled in size.

2. For the filling, pulse all the ingredients except the butter in a food processor until the nuts are very finely chopped. Set aside until needed.

3. Punch down the dough and knead briefly until it is smooth. On a lightly floured surface, roll it out to a rectangle about 16" x 12". Use a pastry brush or your fingers to spread the butter over the dough, leaving about 3/4" clear on all sides. Sprinkle the filling evenly over this. It is a generous amount, but the butter will eventually absorb it. Roll up from one long end. Trim the roll so that it measures 14" and discard the end pieces [I used the ends to make mini rolls with the filling that fell out as I cut the main roll.] Cut the resulting log at intervals of 1 1/2", so that you end up with 9 pieces.

4. Grease and line an 8" square baking pan, then arrange the dough pieces in three rows of three [I tucked the mini rolls in there too]. Cover loosely with plastic wrap and leave it in a warm place until almost doubled in size. The buns will now be pressing cozily against each other; this slight over-crowding gives nice soft sides.

5. Meanwhile, preheat the oven to 350F. Bake in the oven for 25 minutes, or until golden brown. Leave in the pan for about 5 minutes before turning out in its entirety onto a wire rack. Break the buns off as needed. That way, the sides stay softer for longer.

Tuesday, September 22, 2009

It's Good to Be Home

I may have been sipping passion fruit and acai juices last week in Brazil, but I had fall on my mind. It was the middle of September and I couldn't wait to get home to go apple picking. I'd already made plans to drive up to an orchard near Warwick, NY, the day after I got back, and thankfully, when the day came, it was gorgeous.

My sister and I headed to Jessup Road Orchard and spent a beautiful morning picking half a bushel of apples. Though the woman working at the shop gave us a map explaining which varieties were ready for picking, we got a little lost once we were out in the orchard, so we aren't exactly sure what kind of apples we wound up with. Our m.o. went something like this: pull an apple off a tree, polish it on our shirt, take a bite. If it was crisp and sweet and maybe a little tart, too, we'd go to town and pick a dozen or more. If it didn't have quite as sharp a bite, we tossed it and moved on. It was a flawless system.

I've been eating about four apples a day since Sunday, and tonight I wanted to do something different. After a long day at work and an hour of tennis, I didn't have the energy for a pie. What I did have, though, was butter, buttermilk and kitchen staples like flour, sugar, brown sugar and cinnamon. And plenty of apples! Just the things for Apple Upside-Down Biscuit Cake.

This tarte tatin-like dessert is super-simple. You melt butter in a skillet, stir in brown sugar, and lay apple slices on top. Then you drop a basic biscuit dough on top, spreading it all over the apples, and bake it for 20 minutes or so. The only tricky part comes when the cake's out of the oven, since you have to invert it onto a plate. I advise waiting longer than the recipe's suggested three minutes, and I actually let Fork do the heavy lifting (and he did singe a few arm hairs in the process). But the end result is a delicious cake, light and rustic. This is the perfect weeknight dessert, or the ideal sweet for people who say they don't bake. And it's making me so glad to be back home.--S

Apple Upside-Down Biscuit Cake

For topping:
3 tablespoons unsalted butter
1/2 cup packed light brown sugar
1 lb Granny Smith apples [or other tart apples], peeled, cored, and cut into thin wedges

For cake:
1 cup all-purpose flour
1/4 cup granulated sugar
1 teaspoon baking powder
1/2 teaspoon baking soda
1/2 teaspoon salt
1/2 teaspoon cinnamon
5 tablespoons cold unsalted butter, cut into pieces
1/2 cup well-shaken buttermilk

Accompaniment: crème fraîche or sour cream (optional)

1. Preheat oven to 425°F. Heat butter in an ovenproof 10-inch heavy skillet (preferably well-seasoned cast-iron) over moderate heat until foam subsides. Stir in brown sugar and remove from heat. Spread mixture evenly in skillet and arrange apples, overlapping, in 1 layer.
2. Blend flour, sugar, baking powder and soda, salt, and cinnamon in a food processor. Add butter and pulse until mixture resembles coarse meal. Transfer to a bowl and add buttermilk, stirring just until mixture is moistened.
3. Drop batter on top of apples and gently spread, leaving a 1-inch border around edge of skillet. (Cake needs room to expand.)
4. Bake cake in middle of oven until golden brown and firm to the touch, 25 to 30 minutes. Cool cake in skillet on a rack 3 minutes [I suggest 10 minutes], then invert onto a platter. Replace any apples that stick to skillet on cake. Serve warm.

Recipe courtesy of Gourmet