Monday, July 27, 2009

Don't Judge a Casserole...

I admit Chile Relleno Casserole does not have "Spoon" written all over it. It's true that it doesn't require a long list of ingredients and can be prepared fairly quickly--two qualities I often look for in a recipe. But I'm generally not a casserole kind of girl (Italian casseroles like baked ziti, lasagna and baked macaroni not withstanding). Also, since "relleno" means "stuffed" or "filled," I couldn't figure out what was stuffed in this recipe. I envisioned the labor-intensive task of stuffing individual chilies with some sort of complicated mixture. Still, when I met cookbook author and publisher Tod Davies and she singled this recipe out as one that epitomized her approach to cooking, I knew I had to give it a try.

This is definitely a case of "you don't know until you try it," because Chile Relleno Casserole is actually quite good. It's essentially a layered vegetable-cheese-egg dish, a sort of twist on huevos rancheros. The bottom layer is shredded jack cheese. On top of that are diced roasted green peppers, then canned green chilies, then shredded cheddar. Over this you pour a mixture of beaten eggs and milk, seasoned with salt, and then top it with paprika. You bake it in a 350-degree oven for 40 minutes or so, and that's it.

I used smoky Spanish paprika (Fork came home about halfway through the cooking and said, "Smells like bacon"--ha!), which I think gave the dish a little depth. We topped our servings with chopped scallion and cilantro, and a squirt of lime juice. With some blue corn tortilla chips, this made a light, easy supper. Here's to trying new things...--S

Chile Relleno Casserole

Serves 4-6

1. Roast 2 large green peppers. Seed them. Dice into large pieces.
2. Get about 1 1/2 seven-ounce cans Ortega green chiles, whole or diced, about 11 ounces.
3. Grate 10 ounces Jack cheese (.63 lb.) and 10 ounces sharp Cheddar.
4. 1 1/3 c. of milk.
5. In a huge, flat casserole that's been greased, spread the Jack, the peppers, the chile, the Cheddar.
6. Beat 3 large eggs. Add the milk and 1/2 t salt. Pour over casserole mixture. Paprika top.
7. Bake at 350 for about 40-50 minutes.

Note: I halved the recipe, using one can of chilies, about 4 ounces of each of the cheeses, and one egg.

Recipe courtesy of
Jam Today.

Wednesday, June 03, 2009

My New Favorite Cut

Fork's favorite cut of beef is a tie between flank steak and skirt steak. He says they're the most flavorful cuts and "just taste the best." They're also very forgiving, he says. Dedicated readers of this blog will notice I don't cook a lot of beef, but it's not because I don't like it. I just don't really know what I'm doing. But flank steak and skirt steak are forgiving! And flavorful! And I am here to tell you Fork was absolutely right. (Duh!)

I picked up just under a pound of Skirt Steak and marinated it for an hour in a Ziploc bag filled with a delicious puree made from olive oil, soy sauce, scallions, red onions, garlic, lemon juice, red pepper flakes, cumin and brown sugar. After an hour, I took the meat out, blotted it semi-dry with a paper towel, and fired up my griddle on the highest flame for a full five minutes. And then, I laid the meat onto the sizzling hot pan, and sizzle it did. The sizzle was very dramatic and meaty, I have to say. It made me feel like a serious chef. Or it did for just a few minutes, anyway, because the steak didn't take very long to cook. About two minutes per side (I'd cut the meat into three pieces), and then I took it off the pan to rest.

The steak had taken on a black char in parts, I'm guessing from the sugar in the marinade hitting the super-hot pan. But inside, it was perfectly medium rare. The marinade gave the steak a little bit of heat, but also a subtle sweetness. It was pretty fantastic, actually. I think I may have a new favorite cut of beef now, too.--S

Skirt Steak

1/2 c olive oil
1/3 c soy sauce
4 scallions, washed and cut in 1/2
2 large cloves garlic
1/4 c lime juice [I used lemon juice, only because I didn't have any limes]
1/2 t red pepper flakes
1/2 t ground cumin
3 T dark brown sugar or Mexican brown sugar
2 pounds inside skirt steak, cut into 3 equal pieces

1. In a blender, put in oil, soy sauce, scallions, garlic, lime juice, red pepper, cumin, and sugar and puree. In a large heavy duty, zip top bag, put pieces of skirt steak and pour in marinade. Seal bag, removing as much air as possible. Allow steak to marinate for 1 hour in refrigerator.

2. Remove steak from bag and pat dry with paper towels.

3. Heat griddle at highest flame and let it heat up for five minutes. Put steak on griddle and cook about two minutes per side. Let rest 10 minutes.

Marinade from Alton Brown

Sunday, May 31, 2009

Dinner at Home, Finally

After spending three days schlepping around the Javits Center for BookExpo, I wanted nothing more tonight than a home-cooked meal. This year's show did entail some good eats, including a wonderful party hosted by the Lee Bros., which featured boiled peanuts, fried chicken and Dogfish Head beer. But it also entailed choking down a squished turkey sandwich in the basement of the convention center as I filed stories on deadline.

So a homemade dinner was definitely on the menu. I decided to make Hunter's-Style Chicken with Rosemary, which sounds much better in Italian: Pollo alla Cacciatora. I'll save my grandfather's legendary version for another post, but this version, from Lidia's Italy, is very, very good. It fit the bill nicely. The ingredient list is brief (chicken, garlic, rosemary, red pepper flakes, plum tomatoes). The procedure couldn't be simpler (brown chicken in olive oil; add garlic, rosemary, hot pepper, crushed tomatoes and water; simmer). And the finished dish was satisfying and delicious.

I made a pot of polenta while the chicken simmered (whisk 1 cup cornmeal with 1 cup water and a dash of salt; stir in 2 cups boiling water; cook over medium heat, stirring, until desired consistency). As Lidia advises (and you know how I trust her), it's nice to spoon the chicken--which, once finished, is falling off the bone--and tomato sauce on top. The polenta soaks up the sauce, everything melds together, and you've got a wonderful meal. Happiness.--S

Hunter’s-Style Chicken with Rosemary

4-lb chicken cut into 8-10 pieces (I used thighs and drumsticks)
1 1/2 t sea salt or kosher salt or to taste
1/2 c extra virgin olive oil
8 garlic cloves, peeled and sliced in half
2 short branches fresh rosemary with lots of needles
1/2 ts peperoncino flakes or to taste
4 c or a 35 oz can of canned Italian plum tomatoes, preferably San Marzano, crushed by hand

1. Rinse chicken and pat dry. Season with salt. Pour olive oil in pan and set over medium high heat. Place chicken skin side down in pan to brown for 2 to 3 minutes. Turn them over and brown another 2 to 3 minutes. Scatter the garlic into the hot fat in between chicken and then drop in rosemary stems and sprinkle peperoncino over.
2. Keep turning chicken until nicely browned all over, 10 minutes or so, then pour in tomatoes slowly. Slosh the tomato can with a cup of water and pour that in too. Sprinkle another 1/2 tsp salt, raise heat, and turn and stir chicken in juices as they come to a boil.
3. Cover pan, leaving slightly ajar. Adjust heat to maintain steady bubbling. Cook for 20 minutes stirring occasionally and turning chicken. Remove cover and cook another 20 minutes until chicken is tender and cooked through.

Recipe courtesy of Lidia's Italy

Tuesday, May 26, 2009

Culture Club

Yogurt doesn't really get the props it deserves. Obviously it's an easy, healthy breakfast food (my fave: honey, blueberries and some clumps of granola). It's also a great dessert (sprinkle some sugar on top; serve with bananas and a dash of cinnamon). But I also use it as a sauce (stir in some feta, chopped scallions, salt and pepper; or just swirl in some cumin and salt). Plus, you can make it into cheese! With such endless possibilities, I buy a lot of yogurt. And a few months ago I started thinking about making my own.

So I got a yogurt maker. I'm still playing around with the length of time I keep the yogurt in the machine, but the most recent batch I made was delicious. After catching a yogurt-centric episode of Good Eats, I followed a recipe from Alton Brown, and I was impressed. He calls for organic milk, a bit of powdered milk, a dash of honey and a little bit of actual yogurt (so you can build upon the cultures to make your own). The yogurt turned out tangy, smooth and thick but pour-able. I hadn't had yogurt this tasty since our favorite breakfast spot in Tulum.

I know people say appliances that have only one function are a waste. And I know that in a New York City apartment I should probably be judicious about what new gadgets I bring in to my kitchen. But this yogurt maker is kind of cool looking ("Euro Cuisine!"), and, well, I'll admit I was pretty taken with the little glass jars with lids that have an adjustable window for you to change the date (so you know how old the yogurt is when you store it in your refrigerator). I'm such a sucker!

But aside from the fun gadgetry, this yogurt really is delicious. I'm going to try some variations in the next few weeks, so stay tuned. -S

Sunday, May 17, 2009

Whoopee

First let me say that my Peanut Butter Whoopie Pies looked nothing like the picture in Martha Stewart's Cookies (not the first time that's happened). I followed the recipe, but they were not smooth and flat, did not resemble chocolate pancakes, and were instead kind of bulging, amorphous blobs. I used a cookie scoop to make sure each one was the same size, so I don't think that was the problem. I think it had something to do with my oven, which doesn't recover too well when I open the door (as in, the temperature drops and doesn't come back up for, like, 20 minutes. I need to deal with this problem, I know).

Okay, now that I've gotten that out of the way: these whoopie pies really are tasty. A decadent dessert, no doubt--there's a lot of butter between the cakes and the frosting, not to mention buttermilk and lots of sugar. But chocolate and peanut butter go well together, as you might have heard. The cakes are light, and the frosting's divine--especially with a dash of sea salt mixed into it. If you're making these for a party, you might want to make each cake with just a tablespoon of batter, so your pies are a little more bite-sized and manageable. If you're making them for a smaller group, go big. Your friends won't complain, I promise.--S

Thursday, May 14, 2009

Forget Cornflakes

I've heard of using crushed cornflakes to coat chicken, but crushed tortilla chips? That's a new one. Turns out it's a really good one, too.

To make Tortilla Chicken Drumsticks, you whirl corn tortilla chips in a food processor with chili powder, cumin and salt (though you'll want to watch your salt since the chips are pretty salty themselves) until they're coarsely ground. Then you dip chicken drumsticks in a mixture of egg and chili powder (I used cayenne), let the excess drip off, and roll the drumsticks in the ground chip mixture. It adheres quite nicely, thanks to the egg, though you may want to press it on to any spots that didn't pick it up. And into a hot oven they go. After 40 or so minutes, you have crispy, moist, spicy, delicious chicken that could become your new favorite weeknight dinner. No huge ingredient list, items that are easy to find, and inexpensive, to boot.

On the side, roast some potato wedges, and serve everything with Cilantro-Lime Mayonnaise, which tempers the chicken's heat really nicely, and a squeeze of lime juice. You can keep your cornflakes. I'm sticking with tortilla chips.--S

Tuesday, May 12, 2009

All Hail Mikey G

At a talent show-themed birthday party when I was a kid, my cousin Mike dressed up as Julia Child and gave a cooking demonstration. He was about 10 years old. I don't remember what he made but it entailed him telling us to "Set your flame at a nice speed," in a high-pitched voice. Fast-forward about 20 years, and Mike's living in California wine country and still loves to cook. Whether it's lobster bisque or a simple tomato sauce and meatballs, the kid does it really well. The only recipe I have of his is for Caesar Salad Dressing, and though that may seem like a throwaway, it's actually become a staple in my kitchen.

The dressing is just garlicky enough and the perfect consistency for dressing on crisp romaine. I make a few adjustments, like toning down the anchovies, and rarely make an entire recipe, since a halved recipe is usually more than enough for a salad that serves four. You must use a blender or mini-food processor, first to make sure you've pureed the garlic and anchovy, but second because a blender aerates the dressing somewhat, so it's a little frothy and not at all gooey (it's beyond me how waiters who prepare Caesar Salad tableside in fancy restaurants achieve this consistency).

I seriously urge you to make this dressing next time you're having friends, Romans, countrymen over (ha). They'll be hailing you.--S


Caesar Salad

(in blender)
1 c olive oil
4-5 cloves garlic
1 can anchovies [I use only 3 or 4 anchovies]
1 heaping t Dijon mustard
5-6 shakes Worcestershire sauce
1 egg
1/2 c grated parmesan cheese
1/4 to 1/3 c red wine vinegar
Juice from 1/2 lemon
Pinch of salt
Pepper

Friday, May 08, 2009

Back to Basics

After three attempts at vegan baking (in addition to these, I also made a so-so banana bread), I was anxious to get back to what I knew. You know: eggs, butter, sugar, buttermilk. So I reached for a cookbook that never fails me: Kathleen's Bake Shop Cookbook. Aunt Betty had placed a "very good" note on the recipe for Orange Poppy Seed Muffins. I've always liked the lemon-poppy seed combination and had a feeling I'd like orange-poppy, too.

I was right: these muffins are delicious. They are moist, thanks to buttermilk; and light, since the recipe instructs you to beat the egg yolks into the batter, then separately whip the egg whites until they form soft peaks and fold them into the batter. Orange zest brightens the flavor, and the soft crunch of poppy seeds is really nice.

Of course, you will note that the muffin in the photo looks a little well done. I'm still trying to figure out my new oven, although I'm not entirely sure it's a matter of me getting used to it (I think it may need recalibration). But even with their toasty tops, these muffins are pretty terrific. If you know what you're doing with your oven, they'll be even better.--S
Orange Poppy Seed Muffins
1 1/4 c all-purpose flour
1 1/4 t baking powder
1/2 t baking soda
1/4 t salt
1/2 c butter, softened
3/4 c granulated sugar
2 eggs, separated
1 T freshly grated orange rind
1 t vanilla extract
1/2 c buttermilk
2 T poppy seeds
1. Preheat oven to 400 F. Grease nine 3" x 1 1/2" muffin cups.
2. In a medium-sized bowl, stir together flour, baking powder, baking soda and salt.
3. In a large bowl, cream butter and sugar until light and fluffy. Add egg yolks one at a time, beating well after each addition. Beat in the orange rind and vanilla.
4. Add flour mixture and buttermilk alternately to the butter mixture. Fold in the poppy seeds. Beat egg whites to soft peaks and fold into batter. Spoon batter into prepared muffin cups, filling them to the top.
5. Bake for 20 minutes, or until a cake tester inserted in center of one muffin comes out clean.
Recipe courtesy of Kathleen's Bake Shop Cookbook

Tuesday, May 05, 2009

Veal Burger

You know what to do when life gives you lemons... but what about when life gives you leftover ground veal? Make Veal Burgers Stuffed with Mozzarella Cheese.

I'd always thought a cheese-stuffed burger sounded a bit over-the-top. But ground veal has a pretty subtle flavor, so adding cheese (and chopped green onions) gives it a little oomph. Also, it's fun to make little cheese sandwiches with two patties of meat as bread! I'd never had a veal burger before, and it turns out that veal is actually a terrific meat for burgers because it's moist and holds together nicely. It's on the leaner side, so adding some fat--in this case fresh mozzarella--is perfectly justified, in my mind.

This recipe has you whip up a mustard-mayo sauce with lemon zest and sage, which you spread atop the burgers. It also advises you to roast some portobello mushrooms with olive oil and garlic, and put those on your burger, too. I endorse this without hesitation.

"We hated that," Fork commented at the end of dinner. Our plates were wiped clean.--S

Saturday, May 02, 2009

Adventures in Veganism

I'm pretty sure that the photo at left is not vegan-friendly. For one, the milk is from a cow. And secondly, the chocolate chips in that delicious little brownie bite are not vegan chocolate chips. But other than that, I think the vegans would be proud: I am experimenting with vegan baking. Not because I want to become a vegan (I just picked up some sausage for dinner), but because I recently visited BabyCakes NYC, a bakery on the Lower East Side where baker Erin McKenna makes vegan cupcakes, cookies, brownies, scones, muffins and other baked goods. And here's the thing: everything I tasted there was really good.

So I was curious about trying a few recipes from Erin's new book, BabyCakes. Unfortunately, this meant spending about $40 at the health food store on things like xanthan gum and arrowroot. I know: xan-what? Arrowhead? Seriously. This is all brand-new to me, and I'm not quite sold on it yet. But I'm up for the experiment.

The first thing I tried was the Apple-Cinnamon Toastie quickbread. Weird ingredients: garbanzo-fava bean flour, potato starch, arrowroot, xanthan gum, coconut oil ($12 a jar!) and evaporated cane juice (which I learned is a fancy way of saying natural cane sugar--so I guess it's not weird after all). Not weird: baking powder, baking soda, salt, cinnamon, applesauce, vanilla extract and roasted apples. The bread was terrific out of the oven: moist and not overly sweet. But the next morning it was a soggy mess. A tasty soggy mess, but still. Was it because I wrapped it with plastic wrap? Maybe it needed a little air. Or was it some sort of vegan thing?

At least I had most of the ingredients I needed for Brownies. The only thing I needed to buy were chocolate chips (of course, the recipe specifies vegan chocolate chips, but--guess what?--Gristede's doesn't sell them, and I wasn't up for another trip to the completely disorienting baking aisle of the health food store). So in went all the wacky vegan ingredients like garbanzo bean flour and arrowroot (which smells pretty great, actually), and... the brownies turned out great. I mean, delicious. Really! Rich, chocolate-y and the perfect thing with an ice cold glass of... milk. Like I said, I am not going vegan. But I'll eat their brownies!--S

Monday, April 27, 2009

Summer's Visit


Yes, springtime's all about asparagus, rhubarb and ramps, but 85 degrees in April calls for summertime food. I'm talking potato salad, some vegetables thrown together in a quick dressing, and a terrific new scallop dish that I can easily see becoming a regular meal around here once summer arrives for good.

The recipe comes from Rick Moonen's Fish Without a Doubt, a book I'd skimmed for months but hadn't actually cooked from until recently. The marinade caught my eye not only because of its sweet-spicy combination, but because it looked so simple (and I was really needing a simple recipe, having run a half-marathon that morning in 80 degrees, and having totally flopped at dinner the night before). Sea Scallops with Jalapeno-Grapefruit Marinade it was.

The marinade is pretty tart from grapefruit juice and zest, and considerably spicy, with about one and a half diced jalapenos, seeds, ribs and all. But you're only marinating the scallops in the jalapenos, not actually eating them, so it's a very palatable spice. The marinade's other ingredients are cilantro, scallions and dry vermouth (you could probably use a dry white wine)--all summertime staples around here. After marinating the scallops for an hour, we seared them on a griddle (obviously if you had a grill you would use it here) for about three minutes per side.

They were fantastic. A little spicy, and sweet from the grapefruit. Moonen says this is terrific with head-on shrimp, too, which I'll definitely try once summer's here for good.--S

Sea Scallops with Jalapeno-Grapefruit Marinade

Serves 4 (8 as an appetizer)

Grated zest of 1 grapefruit
Juice of 2 grapefruits (about 1 1/3 c, and pulp is fine)
1/4 c minced jalapeno chiles (with seeds)
1/4 c chopped fresh cilantro
1/4 c chopped scallions
1/3 c dry vermouth
3 T olive oil
16 large sea scallops, tough bits removed
Coarse salt and freshly ground pepper

1. Stir the grapefruit zest and juice together with the jalapenos, cilantro, scallions, vermouth and olive oil in a baking dish or plastic container.
2. Immerse the scallops in the marinade, cover, and refrigerate for 1 hour.
3. Prepare a grill so it's very hot.
4. Take the scallops out of the marinade. Season them with salt and pepper and brush them with vegetable oil.
5. Brush the grill with vegetable oil. Grill the scallops for 3 minutes per side. Scallops are like little sponges--they soak up the marinade, which will slow down the cooking. Don't expect these to get very brown, though you should have grill marks.

Recipe courtesy of Fish Without a Doubt

Monday, April 13, 2009

Thrifty and Good

So I hear, there's an elegant restaurant in San Francisco called Spruce where chef Mark Sullivan prepares dishes like California caviar with a potato blini and a brioche ($90) and buttered Maine lobster with gnochhi ($40). An article in Food & Wine a few months ago offered "thrifty" versions of a few of Sullivan's recipes, and while the whole idea of making these fancy dishes for less was a good enough gimmick, what really drew me in was the recipe for Cod with Artichokes and Chickpeas.

At Spruce, Sullivan makes this dish--which is essentially cod fillets browned in a skillet with some olive oil, served over a melange of veggies softened by simmering with chicken stock and seasoned with some herbs--with highbrow ingredients like chanterelle mushrooms and baby artichokes. He charges customers $29. For F&W's home version, they suggest using shiitake mushrooms and frozen artichoke hearts. (I wound up using jarred artichoke hearts, and they worked just fine.) I think Fork & I spent about $29 total for all the groceries we needed for this dish, and it served two, with plenty of vegetables leftover to toss with pasta for another meal.

The other ingredients in the dish are onion, carrots, garlic and chickpeas, so it's pretty healthy. And tasty; the cod was cooked just enough for buttery bite-sized pieces to flake off perfectly. Each bite was a little different, depending on which veggies you'd picked up on your fork. It was a lovely meal, no need for accompaniments, and we wiped our plates clean, thinking, "Twenty-nine dollars a plate--as if!"--S

Wednesday, April 08, 2009

Cupcakes Win

I cooked a decent dinner for some friends the other night: macaroni and cheese carbonara with fontina, pancetta and peas, along with Mom's meatloaf. My lovely husband played bartender and made us all some delicious tequila sunrises with tequila we'd bought in Mexico. And I made homemade vanilla ice cream for dessert, using a vanilla bean I brought back from Martinique. But none of these things made me as happy as the Mini Chocolate Cupcakes with Seven-Minute Icing I made for dessert.

These cupcakes were divine, truly. Moist, light and just chocolatey enough. They kind of reminded me of Hostess cupcakes, the ones with that little dab of frosting in the middle and curlicue designs on top, because they weren't that sock-you-in-the-stomach rich chocolate flavor. Instead, they were like tiny chocolate pillows. The recipe calls for cake flour and all-purpose flour, but since only required a half-cup of each, I just used a full cup of all-purpose and sifted it. The batter also consists of unsweetened cocoa powder, dark brown sugar, granulated sugar, buttermilk and brewed coffee. Pretty heavenly stuff, wouldn't you say?

With marshmallow-ish Seven-Minute Icing on top, plus a smattering of rainbow sprinkles, these cupcakes were my favorite food of the evening. No offense to everything else (even those delectable cocktails), but these were just perfect.--S

Chocolate Cupcakes

Makes 6 large cupcakes, 24 mini cupcakes

1/2 c cake flour
1/2 c all-purpose flour [or use 1 c all-purpose flour and skip the cake flour]
1/3 c unsweetened cocoa powder, preferably Dutch processed
1 1/2 t baking soda
1/4 t kosher salt
1 large egg
1/2 c firmly packed dark brown sugar
1/2 c granulated sugar
1/2 c buttermilk
1/2 c brewed coffee
1/3 c canola oil

1. Preheat the oven to 350. Grease the insides of muffin cups.
2. Sift the cake and all-purpose flours, cocoa powder, and baking soda together onto a piece of parchment paper or into a bowl. Stir in the salt.
3. In a large bowl, whisk together the egg and the brown and granulated sugars.
4. In a small bowl, mix together the buttermilk, coffee and canola oil.
5. In 3 additions, alternately stir the wet and dry ingredients into the eggs. Divide the batter among the muffin cups.
6. Bake until a skewer inserted in the center of a cupcake comes out clean, 15 to 20 minutes. Cool on a wire rack for 15 minutes. Carefully remove the cupcakes from the cups by running a knife around the inside edge of the cup.

Recipe courtesy of A Passion for Ice Cream

Seven-Minute Icing

Makes about 3 cups

3 large egg whites
1 1/2 c sugar
1/3 c cold water
1 T light corn syrup
1/4 t cream of tartar
1 t vanilla

1. Combine all ingredients except vanilla in the top of a large double boiler or a heatproof bowl and beat until thoroughly blended.
2. Set over rapidly boiling water. Beat constantly with a hand-held mixer at medium-high speed, or with a wire whisk, until the mixture stands in stiff peaks, 7 minutes. Remove from the heat.
3. Add vanilla and continue beating until the icing is cooled to room temperature. Use at once.

Recipe courtesy of Joy of Cooking

Wednesday, April 01, 2009

Sunday Dinner with a Twist

Sunday dinner: it's rustic and cozy and homey and familiar. Right? Maybe, like, a nice hearty pasta dish? Rigatoni, perhaps, which holds marinara sauce like no other pasta? Add some sausage for substance. How about a little broccoli rabe, too? And wouldn't some heavy cream make it even better? Hold on.

Andrew Carmellini, who was until recently the chef at the fabulous restaurant A Voce, uses a curious ingredient to add smooth, rich texture and full, earthy flavor to Rigatoni Pugliese: chickpeas. It struck me as a little strange at first; wouldn't chickpeas pureed along with their liquids take things in a decidedly non-Italian, hummus-y direction? At least, I thought they would. But apparently, chickpeas are used all the time in Puglia. And the Pugliese know good food. So I went with it, and am very glad I did.

You start by browning a pound of spicy Italian sausage, out of the casing. Add about three cups of tomato sauce (I used my mom's recipe but any basic one would work). And then, in goes pureed chickpeas and liquid. They add a creaminess that looks a lot like heavy cream would, swirling into the sauce, lightening it in color while thickening it. For the final touch, you blanch and sautee broccoli rabe with a few whole chickpeas and garlic. You boil the macaroni until it's al dente, and then pour it into the sauce, tossing in the rabe and chickpeas. (I added a pat of butter and some pecorino cheese, but that's optional.)

It's a spectacular Sunday supper. I love the idea of substituting a legume for a heavy dairy ingredient. Just a little lighter, but still plenty comforting.--S

Rigatoni Pugliese

Serves 4 to 6

For the sauce:
1 15-oz can chickpeas
¼ c plus 2 T extra-virgin olive oil
1 lb spicy Italian sausage
3 c basic tomato sauce
½ t ground fennel seed

For the broccoli rabe and rigatoni:
1 bunch broccoli rabe, cleaned of outer leaves and bottom stems trimmed
1 lb rigatoni
2 T extra-virgin olive oil
1 clove garlic, sliced Goodfellas thin
¼ t red pepper flakes
salt and pepper to taste

To finish the dish:
2 T butter
2 t extra-virgin olive oil
1 c grated pecorino cheese

To prepare the sauce:
1. Drain the chickpeas well, reserving the liquid. Blend half the chickpeas (about 1 c) and all their liquid on high until the mixture forms a smooth paste, about 1 minute.
2. Heat the olive oil in a large saucepan over high heat. Squeeze the sausage out of the casing and add the meat to the pan. Brown it, stirring regularly and breaking the meat up into small pieces with a spoon or potato masher.
3. Add the tomato sauce and stir to combine.
4. Add the chickpea purée and the fennel seed and stir to combine. Cook over medium heat until the mixture forms a loose sauce and the flavors are combined, about 15 minutes.

To prepare the broccoli rabe and the rigatoni:
1. Bring a large pot of salted water to a boil.
2. Blanch the broccoli rabe until the stems are just softened and the color has deepened, about 90 seconds. Remove with a slotted spoon or spider to a bowl of ice water to immediately stop the cooking process.
3. Return the water to a boil, add the rigatoni and cook until it’s al dente. Drain but do not rinse the pasta.
4. Warm the olive oil over medium-high heat in a medium sauté pan. Add the broccoli rabe, garlic, red pepper flakes, and the remaining half of the chickpeas. Season with salt and pepper and sauté until the greens are well coated, about 1 minute.

To finish the dish:
1. Return the rigatoni to the pot. Add the sauce and cook on medium-high heat, mixing well, until the pasta is well coated, about 1 minute.
2. Remove the pot from the heat and stir in the butter, olive oil, and half the pecorino cheese.
3. Transfer the pasta and sauce to a large serving dish and pour the broccoli rabe and chickpea mixture over the top. Top with the rest of the pecorino cheese and serve immediately.

Recipe courtesy of Urban Italian

Sunday, March 29, 2009

Scoping Out the Neighborhood

Little by little, I'm exploring our new neighborhood. I've yet to find a great butcher or fish store, but I can cross one thing off the list: a good health food store. It's Gary Null's Uptown Whole Foods Store. It has a big produce section, lots of bulk dry goods and a substantial Asian foods aisle... where Fork & I picked up mirin, rice vinegar, naturally brewed soy sauce and udon noodles. I was on my way to making Asian Noodles in Broth with Vegetables and Tofu, a recipe from Peter Berley's Flexitarian Table.

Berley's approach is along the lines of Almost Meatless; he gives instructions for making the dish with either flank steak or soft tofu. It's positioned more as a "please everybody" approach than an environmental or health-oriented one, but the idea is the same: a little less meat and a lot more veggies. We bought the flank steak, which Berley suggested, at Food Emporium. (Not sure I liked the store; while Fork thought their meat department was great, I found other areas lacking. But that's another post!) Turns out, the steak was the part of the dish we liked least. I don't think it has much to to do with Food Emporium; rather, flank steak is such a tough cut that marinating it would've gone a long way towards making it more tender. Instead, Berley has you slice the steak into thin strips and cook it in the broth. The broth, made from soy, mirin, rice vinegar and fresh ginger, was terrific, deeply flavored and smooth. But cooking the steak in it, even for just two minutes, resulted in a grey-ish meat that frankly was just kind of "eh."

Aside from the meat, though, this soup was really great. With udon noodles, snow peas (I used green beans because Food Emporium--ahem--didn't have them), mushrooms, radishes, carrots and scallions, plus a dab of hot sauce, it was well-rounded and filling. I'll definitely return to this soup, building on what I know now. And hopefully once I find a good butcher, I'll try it again, with a strip steak, or even just a sirloin. Like our new 'hood, this one's got lots of possibilities.--S

Asian Noodles in Broth with Vegetables and Tofu/Steak

serves 4 (2 servings tofu; 2 servings steak)

1 8-ounce package udon noodles

BROTH
½ cup soy sauce
1/3 cup mirin
3 T rice vinegar
1 T finely grated peeled fresh ginger
1 c snow peas, strings removed and halved crosswise on the diagonal
1 c thinly sliced mushrooms
6 oz flank steak, sliced against the grain into short thin strips
8 oz soft tofu, cubed

GARNISHES
1 romaine lettuce heart, finely shredded
½ c thinly sliced red radishes or daikon matchsticks
½ c carrot matchsticks
2 scallions, white and light green parts only, thinly sliced
Toasted sesame oil, for serving (optional)
Hot sauce, for serving (optional)

1. Bring a large pot of water to a boil. Add the noodles and cook until al dente, about 8 minutes. Drain and divide among four large soup bowls.
2. In each of two small saucepans, combine 1 ½ c water with half of the soy sauce, mirin, vinegar, and ginger and bring to a simmer over medium heat. Add half the snow peas and half the mushrooms to each pan, then add the steak to one pan and the tofu to the other. Simmer until the snow peas are crisp-tender, the meat is cooked, and the tofu is heated through, 3 to 5 minutes.
3. Divide the vegetable garnishes among the bowls and ladle the hot soup over the noodles. Drizzle each serving with a few drops of sesame oil and hot sauce, if desired. Serve immediately.

Recipe courtesy of The Flexitarian Table

Monday, March 23, 2009

The Inaugural Dinner

The first night in our new home, we ate some very delicious eggplant parmigiana my mom had made. But what to make the second night? I knew I'd also want to get some unpacking done, so I couldn't throw myself into a three-hour dinner making extravaganza. But I didn't want some chintzy, hastily assembled dish like salade nicoise or sauteed shrimp, which I'd been considering, and I'm sure would be fine, but not momentous enough for the first home-cooked meal. I could've tried a new recipe from any one of my many cookbooks, but what if it was a dud? That wouldn't be a good omen for the first real meal in a new home. I was pretty much stressed out over dinner, and it wasn't good.

And then, the epiphany: a family recipe. Something I knew how to make by heart; that I'd never screwed up; that was hearty, homey and good; and that we didn't eat all the time but that we always enjoyed. It was Pork Chops and Vinegar Peppers, and it was just the thing.

I grew up loving this dish, with its acidic peppers smoothed out just a bit by chicken stock and pork, with spaghetti on the side. I loved it so much that in third grade, when we were going around the classroom naming our favorite dinners, I proudly said, "Pork chops and vinegar peppers" when everybody else was saying meatloaf and pizza, and got a chorus of ewwws. But I didn't care.

This is a quick meal to put together; the hardest thing might be finding the vinegar peppers, depending on where you live. B&G Foods makes them; the company started in Manhattan in 1889 and apparently has not achieved world domination yet. I guess other peppers would work, but the dish won't really be the same. The peppers in vinegar are tangy and add such a nice punch to the pork. Other than that, things are straightforward: brown chops, saute peppers, add juices, cook until pork is done, serve over spaghetti mixed in with all the juices and lots of parsley.

Hoping this is the beginning of many more delicious, happy meals.--S

Pork Chops and Vinegar Peppers over Spaghetti

Serves 4

4 center-cut pork chops on the bone
Olive oil
2 cloves garlic, minced
1 large jar red bell peppers in vinegar
2-4 T fresh parsley, minced plus more for garnish
1/2 c chicken stock
1/2 lb spaghetti

1. Warm 2-3 t olive oil in a large nonstick fry pan. Season pork chops with salt and pepper. Brown chops in pan 1-2 minutes per side on medium high heat. Remove chops from pan.
2. Slice peppers and reserve the vinegar from the jar. Add 2-3 t olive oil to the pan and saute peppers for 5 minutes. Add minced garlic and cook 1 minute. Add stock and 1/4 c reserved vinegar.
3. Return the chops to the pan along with parsley. Cover and simmer on low flame 5-7 minutes, until pork registers 155 degrees or is slightly pink inside. Meanwhile, cook pasta in boiling, salted water until al dente.
4. Place chops and pepper son a serving platter. Toss pasta with liquid from pork chop pan. Sprinkle with parsley and serve with grated parmesan cheese.

Tuesday, March 17, 2009

Out with Chicken Pot Pie

We're moving tomorrow--finally! And so I present to you the final recipe in the Operation Clean Out the Pantry series. Drumroll please...

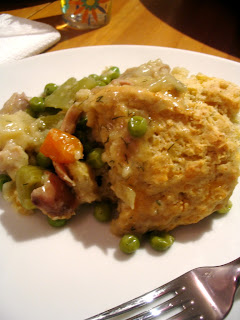
On the "let's finish this up" list were about four skinless chicken thighs, on the bone; buttermilk; herbs; mushrooms; cheddar cheese; and a big bag of all-purpose flour. I have to say, the challenge of figuring out what to make with odds-and-ends ingredients like that is a lot easier if you use the Internet. A search on Epicurious led me to Turkey Potpie with Cheddar Biscuit Crust, which I quickly determined could be easily adapted to my ingredients. The recipe actually was meant to use up leftover turkey after Thanksgiving, and I'm sure that's a terrific use for the meat. But I'll also say that roasting chicken in a 400-degree oven for 40 minutes and then pulling it off the bone, shredding it to chunks, works just fine as well. The other sub I made was dill in the place of thyme. Other than that, I followed the recipe.

You cook onion, celery, chopped parsnip and herbs until tender, and then toss in some chopped mushrooms, stirring them until they're soft. You thicken the veggies with a sprinkle of flour, and then pour in a fair amount of chicken stock. Once your soup is nice and thick, you stir in the meat and a box of frozen peas, and season the entire thing with salt and pepper. And this is where things get interesting. While the veggies were cooking, you had already whipped up a quick biscuit dough made with buttermilk, butter, Parmigiano and grated sharp cheddar. So you take that batter, which is quite lumpy, and drop dollops of it on top of the thickened soup/meat mixture. And then you slide the rather bizarre-looking creation into a 400 degree oven for 35 minutes.
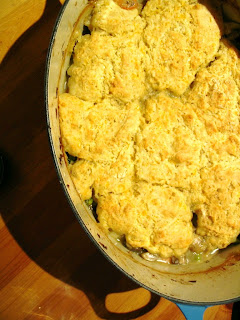
This was one of those dishes which, when cooking, your mouth is watering so much that it takes everything in your power not to tear the dish from the oven and dig in right there. The smell of buttermilk biscuits, savory vegetables and roasted chicken have to be some of the most appetizing I know, and taken together? Hold me back. Of course, we had to wait another nearly interminable 10 minutes for the dish to cool before we could spoon it out, but eventually that time came, and let me tell you, it was sweet. Amazing, actually. The biscuit was thick and fluffy; the flavors of the meat and vegetables underneath had melded together into a warm and comfy stew. It was heaven, seriously.

And with that, I'm off to our new kitchen!--S

Turkey Potpie with Cheddar Biscuit Crus

Serves 8

For stock:
Carcass and skin from a 12- to 14-pound roast turkey
10 cups water

For filling:
1 medium onion, coarsely chopped
2 large carrots, cut into 1/2" pieces
2 celery ribs, cut into 1/2" pieces
1 large parsnip (peeled), cored and cut into 1/2" pieces
1 t chopped thyme
3 T unsalted butter
1/2 lb mushrooms, trimmed and quartered
1/4 c all-purpose flour
4 c roast turkey [or chicken] meat, cut into 1/2" pieces
1 (10-oz) package frozen baby peas, thawed
[3 1/2 c chicken stock]

For biscuit crust:

2 c all-purpose flour
2 t baking powder
1 t baking soda
1/2 t salt
1/2 t black pepper
1 c coarsely grated extra-sharp Cheddar
1/4 c grated Parmigiano-Reggiano
3/4 stick cold unsalted butter, cut into 1/2" pieces
1 1/4 c well-shaken buttermilk

Separate parts of carcass and put, along with skin, in an 8-quart pot. Cover bones with water and simmer until liquid is reduced by one third, about 1 1/2 hours. Strain through a fine-mesh sieve into a large bowl. Set aside 3 1/2 cups stock (reserve remainder for another use).


Make filling:

Cook onion, carrots, celery, parsnip, and thyme in butter with 1/2 teaspoon salt and 1/4 teaspoon pepper in a 12-inch-wide shallow pot (3- to 4-quart), covered, over medium heat, stirring occasionally, until vegetables are almost tender, 10 to 12 minutes. Add mushrooms and cook, uncovered, stirring, until tender, 5 to 7 minutes.

Sprinkle with flour and cook, stirring constantly, 2 minutes. Stir in stock (3 1/2 cups), scraping up any brown bits, and bring to a boil, stirring, then simmer until slightly thickened, about 3 minutes. Stir in turkey, peas, and salt and pepper to taste. Reheat over low heat just before topping with biscuit crust.


Make biscuit crust and bake pie:

Preheat oven to 400°F with rack in middle.

Sift together flour, baking powder, baking soda, salt, and pepper into a medium bowl. Add cheeses and toss to coat. Blend in butter with a pastry blender or your fingertips until mixture resembles coarse meal. Add buttermilk and stir just until a dough forms. Drop biscuit dough onto filling in 8 large mounds, leaving spaces between biscuits.

Bake until biscuits are puffed and golden brown and filling is bubbling, 35 to 40 minutes. Let stand 10 minutes before serving.


Cooks' notes:

· If using carcass and meat from a brined turkey, filling may need little or no salt.

· Filling can be made in a 12-inch skillet and transferred to a 13- by 9-inch baking pan before topping with biscuit dough.
· You can substitute another turkey stock or reduced-sodium chicken broth for the stock in this recipe. You can also make stock using leftover cooked chicken in place of turkey.

1. Separate parts of carcass and put, along with skin, in an 8-quart pot. Cover bones with water and simmer until liquid is reduced by one third, about 1 1/2 hours. Strain through a fine-mesh sieve into a large bowl. Set aside 3 1/2 cups stock (reserve remainder for another use). [Skip this step if you're using pre-cooked chicken.]
2. Cook onion, carrots, celery, parsnip, and thyme in butter with 1/2 t salt and 1/4 t pepper in a 12-inch-wide shallow pot (3- to 4-quart), covered, over medium heat, stirring occasionally, until vegetables are almost tender, 10 to 12 minutes. Add mushrooms and cook, uncovered, stirring, until tender, 5 to 7 minutes.
3. Sprinkle with flour and cook, stirring constantly, 2 minutes. Stir in stock (3 1/2 c), scraping up any brown bits, and bring to a boil, stirring, then simmer until slightly thickened, about 3 minutes. Stir in turkey, peas, and salt and pepper to taste.
4. Preheat oven to 400°F with rack in middle.
5. Sift together flour, baking powder, baking soda, salt, and pepper into a medium bowl. Add cheeses and toss to coat. Blend in butter with a pastry blender or your fingertips until mixture resembles coarse meal. Add buttermilk and stir just until a dough forms. Drop biscuit dough onto filling in 8 large mounds, leaving spaces between biscuits.
6. Bake until biscuits are puffed and golden brown and filling is bubbling, 35 to 40 minutes. Let stand 10 minutes before serving.

Recipe courtesy of Gourmet

Tuesday, March 10, 2009

Friday, March 06, 2009

Bulgur with Coconut, Ginger and Almonds

We've scheduled our move for March 18, and you know what that means... Operation Clean Out the Pantry is kicking into high gear. For the dish I'm about to tell you about, I used up a bag of bulgur that had been knocking around in the cabinet for a few months. This dish was so tasty that I'm tempted to buy more bulgur to make it again, even if it thwarts my efforts to empty the pantry pre-move.

It's just a variation on whole grain breakfast cereal, and it barely needs a recipe. Bulgur with Coconut, Ginger and Almonds is pretty self-explanatory. I stirred in a bit of milk to bind everything together, and plain yogurt would work well, too. Bulgur, which is apparently akin to cracked wheat, has a nutty flavor and chewy texture (for everything you ever wanted to know about bulgur, check out this article). And it cooks quickly: you bring it to a boil in a pot of water, then turn off the heat, put a lid on the pot, and let it sit for 25 minutes--just long enough to hop in the shower and get dressed. When you're ready, so is your bulgur.--S

Bulgur with Coconut, Ginger and Almonds

Serves 2

2/3 c bulgur
1 1/3 c water
2 T chopped crystallized ginger
Handful of chopped almonds
Handful of sweetened coconut, shredded

1. Put the bulgur and water in a saucepan and bring to a boil. Cover tightly, turn it off, and leave for 25 minutes while you take a shower and get dressed.
2. Stir in ginger, almonds and coconut; add a splash of milk.

* The variations here are endless: spices dried fruits, seeds... go nuts!

Tuesday, March 03, 2009

Cod with Ginger and Scallions

I don't know why I've held out on sharing this recipe with you for so long. I've been making it every couple of months for a few years now, and it's always good. It's fast, easy, healthy and delicious. It's Steamed Cod with Ginger and Scallions, and I think you should add it to your repertoire, too.

Most of the time, I have all the ingredients I need for this recipe in my kitchen already, save for the cod. The Monterey Bay Aquarium Seafood Watch Program recommends you use Pacific cod; if you can't find it, you could use red snapper or sea bass. But it's worth it to splurge on a nice piece of fish, because the flavors and preparation are so simple that the fish really is the star here. You whisk rice vinegar, soy sauce and grated fresh ginger in a large skillet, lay your salted and peppered cod fillets onto the liquid, and then bring it to a boil. Lower the heat to a gentle simmer, cover and let it cook for six minutes or so, a little longer if your fish fillets are thicker. Then, when the fish has about two minutes to go until it's opaque throughout, you lay the green parts of a handful of scallions over the fish, and let them wilt while the fish finishes cooking. That's it!

The cod flakes away in such beautiful pieces, and it's gently infused with soy and ginger. (In the picture above, you can see the cod actually broke apart as I was taking it out of the skillet--not that that bothered me.) The scallions are a little al dente, and eating a forkful of cod and scallion together gives you a great variety of textures. With some rice and veggies, you've got a simple and extremely tasty supper. Sorry it took me so long to share this one with you!--S

Steamed Cod with Ginger and Scallions

serves 4

4 skinless cod fillets (6 to 8 ounces each)
3 T rice vinegar
2 T soy sauce
2 T finely grated, peeled fresh ginger
Coarse salt and ground pepper
6 scallions, green parts cut into 3-inch lengths

1. In a large skillet, combine rice vinegar, soy sauce and ginger.

2. Season both sides of cod fillets with salt and pepper; place in skillet with vinegar mixture.
3. Bring to a boil; reduce heat to a gentle simmer. Cover; cook until fish is almost opaque throughout, 6 to 8 minutes.

4. Meanwhile, thinly slice scallions lengthwise. Scatter over fish; cook (covered) until fish is opaque throughout and scallions are just wilted, about 2 minutes more.


Recipe courtesy of Everyday Food