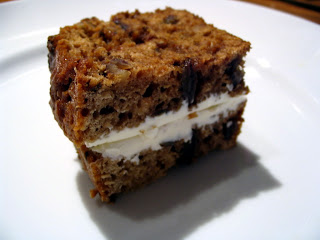
The guys over at Baked are the first to admit their Sour Cream Coffee Cake with Chocolate Cinnamon Swirl is "not the most nutritious breakfast." If that's what you're after, I suggest granola or a homemade power bar. But if you want a real treat--coffee cake and crumb topping in the perfect ratio of moist cake to crumbly topping--keep reading.
This coffee cake is a keeper. It's pretty classic, with its batter made with sour cream, and its crumb topping a mix of brown sugar and nuts. But then there are these tasty in-between layers of chocolate and cinnamon. I love a healthy breakfast as much as the next person, but there is nothing like a delicious piece of coffee cake with a cup of coffee on a winter morning. And 'tis the season, right?
A few notes: I used walnuts in the crumb topping, instead of the suggested pecans. This wasn't a problem. And spreading the batter over the cinnamon swirl is a little tricky. Just do what you can; using a small offset spatula helps. Finally, the recipe suggests you do not substitute low-fat sour cream or yogurt to reduce calories. I absolutely agree.
If you've got family coming into town for the holidays, or a brunch party coming up, or if you're just sick of good-for-you-breakfasts, now's the time. Sour Cream Coffee Cake is calling your name.--S
Sour Cream Coffee Cake with Chocolate Cinnamon Swirl
Serves 16
Crumb Topping
3/4 c all-purpose flour
3/4 c packed dark brown sugar
1/2 t salt
3/4 c pecans [or walnuts, or other nuts], toasted
6 T cold unsalted butter, cut into 1" pieces
Chocolate Cinnamon Swirl
1/2 c sugar
1 t dark unsweetened cocoa powder
1 1/2 t cinnamon
Cake
3 1/2 cups all-purpose flour
1 t baking powder
1 1/2 t baking soda
1/2 t salt
2 sticks unsalted butter, softened
2 1/4 c sugar
4 large eggs
16 oz sour cream
1 1/2 t pure vanilla extract
Crumb Topping:
Put the flour, sugar, and salt in bowl of food processor and pulse to combine. Add the pecans and pulse until they are finely chopped and incorporated. Add the butter and pulse until mixture looks like coarse sand. Cover and refrigerate.
Chocolate Cinnamon Swirl:
Mix ingredients in small bowl.
Sour Cream Cake:
1. Preheat the oven to 350° F. Butter a 9×13-inch baking pan. Sift together the flour, baking powder, baking soda, and salt together in a medium bowl.
2. In the bowl of a stand mixer fitted with the paddle attachment, cream the butter until smooth. Scrape down bowl and add sugar. Beat until the mixture is light and fluffy. Add the eggs, one at a time, beating well after each addition and scraping bowl as needed.
3. Add the sour cream and vanilla and beat just until incorporated. Add the dry ingredients in three additions, scraping down the bowl before each addition and beating only until each addition is just incorporated. Do not overmix.
4. Pour one third of the cake batter into the prepared pan. Use an offset spatula to spread batter evenly in pan. Sprinkle half of the chocolate cinnamon swirl mixture over batter, covering the entire surface of the batter. Spoon half of remaining batter over the swirl mixture and spread it evenly. Top with remaining swirl mixture, then the remaining batter, and spread the batter evenly. Sprinkle the crumb topping evenly over the top of the batter.
5. Bake in the center of the oven for one hour, or until a toothpick inserted in the center of the cake comes out clean. Let the cake cool on a wire rack for 30 minutes.
The cake keeps for a few days, tightly covered, at room temperature.
Sunday, December 14, 2008
Monday, December 08, 2008
Party Time
Sure, I take a two-week break from blogging, and all of a sudden, the holidays are upon us. Time to shop, bake, party... and eat hors d'oeuvres! I have a perfect one, so listen up. It's easy, festive, can be made ahead of time, and looks rather impressive. And I have yet to find a partygoer who does not like to pop two or three of them between sips of wine or beer.
Pepperoni and Asiago Pinwheels are your new go-to appetizer. All you need to make them are a medium-sized block of Asiago cheese, a package of thinly-sliced pepperoni, honey mustard (make your own if you don't have any), some dried herbs, an egg and a package of frozen puff pastry dough. You thaw the dough, unfold it and spread some honey mustard around. Lay the pepperoni in a single layer, top it with grated Asiago that you've tossed with dried thyme, oregano and pepper, and then roll the whole thing up, sealing the seam with a bit of egg. At this point you can put the roll in the fridge for anywhere from a half-hour to a day, and 15 minutes before you want to eat the pinwheels, you slice the log rather thinly, lay the slices (which resemble misshapen pinwheels at this point) on a baking sheet, and toss them in a 400-degree oven for 15 minutes.
It's like a Shrinky-Dink experiment: 15 minutes later you have gorgeously puffed-up, bite-sized pinwheels, oozing cheese and spiked with herbs. They're rather addictive, actually. Go ahead, I dare you to find someone who'll say no when you're passing these babies around at a party this holiday season.--S
Pepperoni and Asiago Pinwheels
Makes about 60 pinwheels
1/2 c grated Asiago cheese
3/4 t dried thyme
3/4 t dried oregano
1/4 t ground black pepper
1 sheet frozen puff pastry (half of 17.3-ounce package), thawed
2 T honey-Dijon mustard
2 oz packaged sliced pepperoni (about twenty-four 1 1/2-inch-diameter slices)
1 large egg, beaten to blend
Nonstick vegetable oil cooking spray
1. Mix first 4 ingredients in medium bowl.
2. Cut puff pastry crosswise in half to form 2 rectangles. Spread 1 T mustard over 1 puff pastry rectangle, leaving 1-inch plain border at 1 long edge. Place half of pepperoni in single layer atop mustard. Top pepperoni with half of cheese mixture. Brush plain border with egg. Starting at side opposite plain border, roll up pastry, sealing at egg-coated edge.
3. Transfer pastry roll, seam side down, to medium baking sheet. Repeat with remaining pastry rectangle, mustard, pepperoni, cheese mixture, and egg.
4. Chill rolls until firm, about 30 minutes, or wrap and chill up to 1 day.
5. Preheat oven to 400°F. Line 2 baking sheets with foil. Lightly spray with vegetable oil spray. Cut each pastry roll into about thirty 1/4-inch-thick rounds. Transfer pinwheels to prepared sheets. Bake until golden, about 15 minutes.
6. Transfer to platter; serve.
Recipe courtesy of The Bon Appetit Cookbook
Pepperoni and Asiago Pinwheels are your new go-to appetizer. All you need to make them are a medium-sized block of Asiago cheese, a package of thinly-sliced pepperoni, honey mustard (make your own if you don't have any), some dried herbs, an egg and a package of frozen puff pastry dough. You thaw the dough, unfold it and spread some honey mustard around. Lay the pepperoni in a single layer, top it with grated Asiago that you've tossed with dried thyme, oregano and pepper, and then roll the whole thing up, sealing the seam with a bit of egg. At this point you can put the roll in the fridge for anywhere from a half-hour to a day, and 15 minutes before you want to eat the pinwheels, you slice the log rather thinly, lay the slices (which resemble misshapen pinwheels at this point) on a baking sheet, and toss them in a 400-degree oven for 15 minutes.
It's like a Shrinky-Dink experiment: 15 minutes later you have gorgeously puffed-up, bite-sized pinwheels, oozing cheese and spiked with herbs. They're rather addictive, actually. Go ahead, I dare you to find someone who'll say no when you're passing these babies around at a party this holiday season.--S
Pepperoni and Asiago Pinwheels
Makes about 60 pinwheels
1/2 c grated Asiago cheese
3/4 t dried thyme
3/4 t dried oregano
1/4 t ground black pepper
1 sheet frozen puff pastry (half of 17.3-ounce package), thawed
2 T honey-Dijon mustard
2 oz packaged sliced pepperoni (about twenty-four 1 1/2-inch-diameter slices)
1 large egg, beaten to blend
Nonstick vegetable oil cooking spray
1. Mix first 4 ingredients in medium bowl.
2. Cut puff pastry crosswise in half to form 2 rectangles. Spread 1 T mustard over 1 puff pastry rectangle, leaving 1-inch plain border at 1 long edge. Place half of pepperoni in single layer atop mustard. Top pepperoni with half of cheese mixture. Brush plain border with egg. Starting at side opposite plain border, roll up pastry, sealing at egg-coated edge.
3. Transfer pastry roll, seam side down, to medium baking sheet. Repeat with remaining pastry rectangle, mustard, pepperoni, cheese mixture, and egg.
4. Chill rolls until firm, about 30 minutes, or wrap and chill up to 1 day.
5. Preheat oven to 400°F. Line 2 baking sheets with foil. Lightly spray with vegetable oil spray. Cut each pastry roll into about thirty 1/4-inch-thick rounds. Transfer pinwheels to prepared sheets. Bake until golden, about 15 minutes.
6. Transfer to platter; serve.
Recipe courtesy of The Bon Appetit Cookbook
Monday, November 24, 2008
The New Classic
My colleagues and I are pretty regular customers at the Chock Full o'Nuts on 23rd Street, between Park and Lex. We stop in once or twice a week for mid-morning coffees, often adding a Chock Classic to our order. A classic indeed (my dad has apparently been a fan of the CC for years and loves it), the CC is a sandwich made from two slices of date nut bread spread with cream cheese. Sounds good, right? My friends and I have shared many a Chock Classic, and with a hot cup of coffee, it makes a fun snack. Here's the thing, though. The Chock Classic is kind of treacly. Really sweet. And they always put on too much cream cheese. And the bread is cold. We want to love the Chock Classic, but we're always a little disappointed.
So this weekend I took matters into my own hands. I went back to a recipe for Date & Walnut Bread that Patricia Wells had contributed to Runner's World a few years ago when she was training for a marathon. I've made the bread before and it's terrific. I substitute whole wheat flour for half the all-purpose flour, and there's no sugar (only honey), plus plenty of chopped dates and toasted walnuts. Once the bread had cooled, I cut a slice, spread a little cream cheese on it and... heaven! Not too sweet, just hearty enough, with the perfect balance of smoothness and crunch. Thank you, Chock Full O' Nuts, for the inspiration.--S
Date and Walnut Bread
1 t walnut [or other] oil
1 1/2 c dates [about 12], pitted and cubed
1/2 c walnut halves, toasted and coarsely chopped
1/2 t baking soda
1/2 t fine sea salt
1/2 c honey
3/4 c hottest possible tap water
2 large eggs, lightly beaten
1 t vanilla extract
1 1/2 cups unbleached, all-purpose flour [I substitute 3/4 c whole wheat flour]
1. Preheat the oven to 375°. Coat a nonstick one quart rectangular bread pan with walnut oil. Set aside.
2. In a large bowl, combine dates, walnuts, baking soda, salt and honey. Add hot water and stir to blend. Add eggs and vanilla to the date mixture and blend thoroughly. Slowly add flour; blend well. The batter will be fairly thick.
3. Pour batter into pan, evening out the top with a spatula. Place the pan in the center of the oven and bake until a toothpick inserted into the center of the bread comes out clean, 40 to 50 minutes.
4. Remove from the pan and let cool for at least an hour. Bread can be stored for up to three days, tightly wrapped in plastic.
Recipe courtesy of Runner's World
Wednesday, November 12, 2008
Viva Espana
In honor of my sister's homecoming (four years in Spain, home FOR GOOD on Friday!), here is a delicious Spanish stew from the effusive, inimitable Jose Garces. I made this tonight, in between a meeting with our wedding photographer and the premiere of season 5 of Top Chef, with plenty of time to spare. It's easy, uses totally accessible ingredients, and is hearty and so flavorful.
The fancy way to make Ham, Escarole and Bean Stew is to slowly simmer white beans in a rich pork stock, and then combine them with cooked pork butt. I am sure that is quite tasty, but a little unrealistic for a Wednesday evening. The easy way to make this dish, and the one I highly recommend you go with, is to substitute bacon and smoked ham for the cooked pork butt, and canned white beans for dried ones. Next time I might sprinkle in some Spanish paprika, but even without, this stew has a delicious, deep flavor. Great texture, too, with crispy bacon, soft potatoes and beans, and slippery bits of ham and escarole.
Spain in a bowl!--S
Ham, Escarole and Bean Stew
6 ounces lean slab bacon, sliced 1/4" thick and cut into 1/4" dice
1 T extra-virgin olive oil, plus more for drizzling
1 small onion, chopped
2 garlic cloves, minced
1 Yukon Gold potato (8 ounces), cut into 1/2" dice
3 c chicken or beef stock or low-sodium broth
6 ounces smoked ham, shredded (1 c)
One 15-ounce can cannellini beans, drained
1/2 small head of escarole, cut into 1/2" ribbons (2 packed c)
Freshly ground pepper
1. In a saucepan, fry the bacon in the 1 tablespoon of olive oil over moderately high heat until browned, about 6 minutes. Spoon off all but 1 T of the fat. Add the onion and garlic and cook over moderate heat, stirring, until softened, about 5 minutes. Add the potato and cook, stirring, for 1 minute. Add the stock and boil over high heat. Reduce the heat to moderate and cook until the potato is tender, about 15 minutes.
2. Add the ham, beans and escarole and season with pepper. Cook over moderately high heat until the escarole is tender, about 5 minutes. Transfer to bowls, drizzle with olive oil and serve.
Recipe courtesy of Food & Wine
Saturday, November 08, 2008
A Simple Soup
Next time you want to make soup but don't feel like soaking beans overnight or building a soup base from scratch, I recommend checking out this excellent soup from the new Bon Appetit book, Fast Easy Fresh. It's Chicken and Escarole Soup with Fennel, and it's delicious.
I wanted a hearty soup to bring to my friends Deena and Matt, who just had a baby. But I didn't have tons of time. This soup was just the thing. Cutting boneless chicken thighs into cubes was about as labor-intensive as it got (and I do suggest going with thighs; they're much more flavorful than breast meat). And I guess you could say washing and chopping a head of escarole is kind of a pain... um... not really. Honestly, this soup is a cinch.
And it's so tasty. The fennel taste is really subtle; don't shy away from this if you're not wild about fennel. The escarole wilts nicely, swirled amid bits of tomato, onion, celery and chicken. Simply great, really.--S
Chicken and Escarole Soup with Fennel
1/4 c olive oil
1 1/2 lbs skinless boneless chicken thighs, cut into 1/2" cubes
1 T dried oregano
2 c chopped onions
4 celery stalks, chopped
4 garlic cloves, chopped
1 t fennel seeds
1 14- to 15-ounce can diced tomatoes in juice
8 c low-salt chicken broth
1 head of escarole, cut into wide strips
Grated Pecorino Romano cheese
1. Heat oil in large pot over medium-high heat. Add chicken; sprinkle with salt, pepper and oregano. Mix in onions, celery, garlic, and fennel seeds. Sauté until vegetables begin to soften, about 4 minutes.
2. Stir in tomatoes. Add broth; bring to boil. Reduce heat to medium; simmer until vegetables and chicken are tender, about 15 minutes.
3. Add escarole; simmer until wilted, about 3 minutes. Season with salt and pepper. 4. Ladle into bowls. Serve, passing cheese separately.
Recipe courtesy of The Bon Appetit Fast Easy Fresh Cookbook
Friday, October 31, 2008
Less Meat: It's What's for Dinner
I was recently flipping through Ten Speed Press's spring 2009 catalog. The California publisher has become one of my favorite houses, and not just because it's the home of 101 Cookbooks blogger Heidi Swanson. Ten Speed's books are beautiful, useful and smart. I paused at the page for a book called Almost Meatless: Recipes That Are Better for Your Health, Better for the Planet. One of the authors, Tara Mataraza Desmond, is a Philadelphia food blogger who'd just run the Chicago Marathon in approximately the same time I hope to run New York on Sunday--and she loves kettle corn. So do I. I was intrigued.
Her blog led me to a recipe Desmond's coauthor, Joy Manning, recently posted on Serious Eats: Butternut Squash and Sausage Bake. I had some chicken sausage in the fridge, and would only need to buy squash and smoked mozzarella to make the dish. I will say, this isn't the quickest dish you'll make all fall, but it's one of the most satisfying and delicious. Cubes of butternut squash, bits of sausage, softened onions scented with sage and thyme, just enough smoky mozzarella, plus crunchy, buttery breadcrumbs on top. We ate this for dinner with a salad and some bread, and had enough leftover for a few lunches. I wholeheartedly recommend you add this to your fall recipe rotation.
Sure, the dish wouldn't have suffered if I'd included more sausage. But it didn't really need it; there were such great flavors from the other ingredients. I'd never become a vegetarian, but I'm happy to go meat lite.--S
Butternut Squash and Sausage Bake
Serves six to eight
1/4 lb Italian sausage
1/4 c olive oil, divided
3 onions, quartered and sliced
5 thyme sprigs
2 t dried sage
salt and pepper
1 small butternut squash, peeled and chopped into 1/2 cubes, (about 6 c) seeds and scrapings reserved
1/4 c flour
1/2 c shredded smoked mozzarella
3/4 c chicken stock
3 slices white sandwich bread, cut into cubes [I used sourdough baguette]
2 T melted butter, optional, plus a little extra to prepare baking dish
1. Preheat oven to 350. Butter a 9"-x-12" baking dish.
2. Remove sausage from its casing and cook in a large skillet over medium heat until just browning, breaking up sausage with a wooden spoon as it cooks. [I used chicken sausage, so I simply sliced it, then halved each slice.] Remove cooked sausage and refrigerate until ready to use.
3. Add enough olive oil to the rendered fat in the skillet to equal 2T, and then add the onions, thyme and sage. Season liberally with salt and pepper. Cook over medium heat for 20 minutes, stirring occasionally, scraping the bottom of the skillet to loosen brown bits. When onions are thoroughly soft, remove and set aside.
4. While the onions cook, simmer the squash seeds and scrapings in the chicken stock for 10 minutes, strain and keep the stock warm over low heat.
5. Add the remaining 2T of olive oil to the skillet. Toss the squash with the flour and arrange in a single layer in the skillet. (If the skillet isn’t big enough, you’ll need to do this in two batches.) Let the squash brown, undisturbed, for 4 minutes then stir the squash as it cooks for the next 4 minutes. Season liberally with salt and pepper and set aside.
6. To assemble the casserole, layer the onions in the buttered baking dish. Dot the onions with the sausage bits evenly, and then top with the squash. Sprinkle the smoked mozzarella over the top, and the pour the stock into the baking dish. Press the top of the casserole with a spatula to evenly distribute the liquid. Cover tightly with aluminum foil and bake for 30 minutes.
7. While the casserole bakes, pulse the bread crumbs with the melted butter (if using) in a food processor until you have coarse bread crumbs.
8. After 30 minutes, pull the baking dish out of the oven, remove the foil, top casserole evenly with breadcrumbs and bake uncovered an additional 20 to 30 minutes, until the liquid is absorbed and the top is nicely browned.
Recipe courtesy of Serious Eats
Monday, October 27, 2008
Pass the Syrup
When I told our house guest last weekend, Darren, that I was making Mac n Cheese Pancakes for breakfast, I didn't get an, "Oooh, that sounds interesting!" or even a grunt of approval. Instead: "Do you eat them with syrup? Because I am SO over pancakes you don't eat with syrup." Apparently Darren had been to some snooty establishment for brunch recently and ordered pancakes that came with a fruit compote. He asked the waiter for syrup and the waiter told him the restaurant didn't have syrup. That's what the compote was for. Excusez-moi.
No such pretentiousness here. The recipe for these pancakes comes from Kenny Shopsin, the locally famous, curmudgeonly short-order cook at Shopsin's General Store here in New York City. (Read my interview with him here.) I doubt Kenny would ever serve pancakes sans syrup (though he allows Lemon Ricotta Pancakes can go without). He's a fan of Grade B maple syrup (incidentally, he is unapologetic about using Aunt Jemima frozen pancake batter).
I was excited to make the mac n cheese pancakes because it also meant test-driving our new griddle. I made the pancake batter from HTCE, and once the griddle was hot enough that water drops bounced off of it, I dropped circles of pancake batter onto the griddle. After about two minutes, I spooned about a tablespoon of cooked, warm elbow macaroni onto the center of each pancake, and then topped it with a thin layer of feather-shredded cheddar cheese. I quickly flipped the pancakes and used the spatula to press them down on the griddle. Once the undersides were golden, about two minutes later, I used "a decisive high-pressure sawing motion to lift and turn the pancakes onto a plate, B-side up." (Don't you love Kenny's instructions?)
Watching this video, I realize I could've cooked the pancakes a little longer, so the cheese got crustier and the mac got oozier. No matter. We spread these babies with butter and poured warm syrup over them, and they were delicious. The macaroni added a different textural element, and the cheese gave them more bite than your average pancake. No pretentiousness here, just some excellent pancakes.--S
Mac ’n’ Cheese Pancakes
Peanut oil, for the griddle
Butter, for the griddle and serving
3 c pancake batter, like Aunt Jemima frozen batter, thawed, or homemade
1 heaping c cooked elbow macaroni, tossed with olive oil and warmed
1 1/4 c shredded cheddar
Grade B maple syrup
1. Clean the griddle by running an oily cloth over it. If the cloth snags, scrape to remove, then wipe down the griddle with peanut oil. Set the griddle over moderate heat.
2. Pour a thin layer of peanut oil over the griddle. Just before you drop the batter, run cold butter across the area where you are going to cook. When it bubbles, drop the batter in 4-inch circles and immediately raise the heat to medium-high. Cook, adjusting the heat as needed, until bubbles appear, 1 to 3 minutes.
3. Sprinkle 1 tablespoon of warm macaroni on each pancake, then 1 tablespoon of cheddar. Using a thin metal spatula, quickly turn the pancakes and gently tap to make them uniform in thickness. Cook until golden, about 2 minutes.
4. Serve, macaroni-side up, with butter and warm maple syrup.
Recipe courtesy of Eat Me
Thursday, October 23, 2008
Plan for Pumpkin
I was going to make date-nut bread, but then I started flipping through Baked: New Frontiers in Baking, and saw a recipe for Pumpkin Chocolate Chip Loaf. The headnotes said it was "extremely easy" with "impressive" results. "The loaf is incomparably moist, and the pumpkin and chocolate chips pair well together for the perfect accompaniment to a hot cup of coffee or tea." Ummm, change in plans. All I needed was a can of pureed pumpkin and I was set.
As promised, the recipe was really easy. It also made an enormous amount of batter, and since one of our new loaf pans is still residing in my parents' basement with the rest of our wedding gifts, and we only have one in the apartment, I used the leftover batter to make four mini-loaves and six muffins. It was all good, though; the smaller parts baked in less than an hour, while the loaf took about an hour and 20 minutes.
I had a feeling this would work out well, because one of the tastiest brownie recipes I've made lately came from the bakery behind Baked. And it certainly did smell fabulous as it was baking. Turns out, this is a terrific quickbread. Sweet, but not too much; moist and with a nice crispy top crust. I'll come back to the date-nut bread, but for now we're loving the pumpkin chocolate loaf.--S
Pumpkin Chocolate Chip Loaf
Makes 2 loaves
3 1/4 c all-purpose flour
2 t cinnamon
1/2 t freshly grated nutmeg
1/2 t ground allspice
1/2 t ground ginger (optional)
2 t baking soda
2 t salt
1-3/4 c (one 15-oz can) pumpkin puree
1 c vegetable oil
3 c sugar
4 large eggs
1 t pure vanilla extract
1-1/2 c (12 oz) semisweet chocolate chips [I used chocolate chunks]
1. Preheat the oven to 350 degrees F. Butter two 9" x 5" x 3" loaf pans, dust them with flour, and knock out the excess flour.
2. In a large bowl, whisk together the flour, cinnamon, nutmeg, allspice, ginger, baking soda, and salt.
3. In another large bowl, whisk together the pumpkin puree and oil until combined.
4. Add the sugar and whisk again. Whisk the eggs into the mixture, one at a time, followed by the vanilla. Add 2/3 cup room-temperature water and whisk until combined. With a rubber spatula, stir in the chocolate chips.
5. Fold the dry ingredients into the wet. Do not overmix.
6. Divide the batter between the prepared pans. Gently knock the bottom of the pans against the countertop to even out the batter. Use the spatula to smooth the tops.
7. Bake in the center of the oven until a toothpick inserted into the center of a loaf comes out clean, 1 hour and 15 minutes to 1 hour and 30 minutes, rotating the pans halfway through the baking time.
8. Transfer the pans to a wire rack and cool for 15 minutes. Invert the loaves onto wire racks and cool completely before serving.
Recipe courtesy of Baked
Sunday, October 19, 2008
Deliciously Unnecessary
Here's the thing about homemade pasta: I know it's not necessary. I live between two excellent shops that carry perfectly respectable dried pasta and pretty delicious fresh pasta. So I'm not going to get all "Homemade pasta is the only option; you simply must make your own, to hell with Barilla!" on you. But. Homemade pasta is really, really good. And the satisfaction of knowing that you (and your pasta machine) spun magnificent fettucine noodles out of flour, eggs and olive oil is not to be underestimated.
Fork and I received the Kitchen Aid pasta roller and cutter attachment as a shower gift. Alas, he was on a fishing trip in Montauk this weekend and missed its debut (but he'll no doubt enjoy the leftovers). So Kate and I gave it a try, and were quite impressed. We followed Lidia Bastianich's recipe for fettucine, using all-purpose flour, eggs, egg yolks, extra-virgin olive oil and ice water. The food processor turned out a soft, stretchy ball of dough in less than a minute, and after it rested for a half-hour, we revved up the stand mixer. Recalling what I'd learned from my mom about making pasta, we began feeding the dough through on the widest setting. We kept running it through, gradually adjusting the thickness setting to four, which resulted in an almost see-through sheet of pasta. Then we ran the sheet through the fettucine cutter, keeping the dough well-floured throughout. We separated the strands and laid them in nests (oh, how I loved those beautiful nests) on floured trays. And so it went for 1 1/2 lbs of pasta dough. The process was easy and fun.
So what to do with all this lovely fresh pasta? We went with Lidia's Fettucine with Squash and Cauliflower, a delicious seasonal dish. Using butternut squash and cauliflower from the greenmarket, plus capers, canned San Marzano plum tomatoes, garlic, onion and hot pepper flakes, we (er, Kate--I had done all the prep work and let her do the cooking!) prepared a warm, cozy, chunky vegetable sauce. The pasta cooked in boiling water for about two minutes, and we tossed it with the sauce, adding lots of pecorino cheese.
The pasta was tender and perfectly cooked, with some little clumps--truth be told, our favorite parts--where we hadn't used enough flour. The squash and cauliflower florets were softened, and the tomatoes strewn throughout added color and texture. We both had seconds, and still barely made a dent in the massive bowl. And this morning I woke up and considered reheating some for breakfast. I held off until lunch, and am digging in right now.--S
Fettucine with Squash and Cauliflower
1/2 c extra-virgin olive oil
3 plump garlic cloves, crushed, peeled
1 small onion, thinly sliced (1 c slices)
3 c butternut squash, cut in 1/2" cubes
3 c cauliflower, cut in small florets (about 1")
4 T small capers, drained
1 t coarse sea salt or kosher salt or to taste, plus more for cooking pasta
1/2 teaspoon peperoncino flakes, or to taste
2 c canned Italian plum tomatoes, preferably San Marzano, crushed by hand
1 lb pound fettuccine
1 c freshly grated pecorino
1. Pour the olive oil into the big skillet and set over medium-high heat. Scatter in the sliced garlic and let it start sizzling. Stir in the onion slices and cook for a couple of minutes to wilt. Spill in all the cut squash and cauliflower pieces, scatter the capers, salt and peperoncino on top and with tongs toss all together for a minute or so. Pour a cup of water into the skillet, cover tightly and steam the vegetables for 2 or 3 minutes, shaking the pan occasionally.
2. Pour in the crushed tomatoes along with a cup of water sloshed in the tomato containers. Stir well and cover. When the tomato juices are boiling, adjust the heat to keep them bubbling gently. Cook covered for about 10 minutes, stirring occasionally. When the vegetables are softened, uncover and continue cooking to reduce the pan juices to a good consistency for dressing the pasta, about 5 minutes. Adjust the seasoning to taste and keep at a low simmer.
3. While the sauce is cooking, heat the salted pasta cooking water to a rolling boil (at least 6 quarts water and a tablespoon salt). Drop in the fettuccine and cook until barely al dente. Lift them from the water, drain for a moment, then drop onto the simmering vegetables. Toss and cook all together for a couple of minutes, over moderate heat. Moisten the dish with pasta water if it seems dry; cook rapidly to reduce the juices if they're splashing in the skillet.
4. When the pasta is perfectly cooked and robed with sauce, turn off the heat. Sprinkle over the grated cheese, toss into the pasta and serve.
Recipe courtesy of Lidia's Italy
Thursday, October 16, 2008
Falling
Sunday may have been the most beautiful day we've had so far this fall. Gorgeous blue sky, warm sun, and where we were, in Orange County, New York, the leaves were just beginning to pop. As the sun set, the air felt cool and crisp. It was so lovely, and when we got back to the City on Monday and received a generous bag of Macoun apples from one of our neighbors, I knew I wanted to use them to make something that would keep that fall feeling going. An apple dessert would of course be a natural, but seeing as I've been eating more than my share of sweets lately and have a marathon coming up in two weeks, I wanted something a tad healthier. So I went with Cranberry Applesauce, the kind of sweet you can eat for breakfast without suffering a sugar crash around 11AM.
This recipe really is a snap, and the applesauce is nice and tart, with a hot pink color that looks almost as if strawberries or raspberries were involved. I used a quarter-cup of sugar instead of a half, and it came out fine, and instead of using a food mill to puree it (our apartment can only hold so many kitchen appliances), I employed my hand blender, which worked perfectly. I've been snacking on the applesauce by itself, but it would probably be marvelous with pork or turkey, too. Oh, and one more thing: it smells divine!--S
Cranberry Applesauce
Makes about 3 cups
4 apples (about 2 lbs), peeled, cored, and chopped
1 c fresh cranberries, picked over
1/2 c sugar
1/4 c apple juice or water
a 3-in. cinnamon stick
a 3-in. strip of lemon zest removed with a vegetable peeler
2 T unsalted butter
1. In a heavy saucepan cook the apples, the cranberries, the sugar, the apple juice or water, the cinnamon stick, and the zest over moderate heat, stirring, for 15 minutes, or until the apples are very soft.
2. Discard the cinnamon stick and teh zest, force the apple mixture through the medium disk of a food mill into a bowl, and stir in the butter. Serve the applesauce warm or chilled. The applesauce keeps, covered and chilled, for 1 week.
Recipe courtesy of Gourmet
Thursday, October 09, 2008
Glazed Over
I made this Glazed Lemon Bread the other night. I had a feeling it would be good--it's from a cookbook I trust, the ingredients are wholesome and tasty, and, if I'm being honest, it involved using our new stand mixer, which made me happy. And it was good. But the best part--the outsides of the bread, which had been doused in lemon glaze--was really good.
I was worried that the glaze--which you pour over the hot bread, just out of the oven, still in the pan--would be too sweet. After all, it's just lemon juice and sugar, melted down into a concentrated syrup. And, I'll admit it, I have a sweet tooth, so just because the glaze was tasty to me, I feared others might find it cloying.
My fears were laid to rest (or my friends are liars), because two of my friends commented that they loved the bread, and that the glaze was the best part. Maybe everyone has a secret sweet tooth?--S
Glazed Lemon Bread
Serves 8
1 2/3 c all purpose flour
1 t baking powder
1/2 t salt
1 1/2 c sugar
1/2 c (1 stick) unsalted butter, room temperature
2 large eggs
2 t (packed) grated lemon peel
1/2 c whole milk
1/4 c fresh lemon juice
1. Preheat oven to 350°F. Lightly butter 8 1/2 x 4 1/2 x 2 1/2-inch loaf pan.
2. Stir flour, baking powder and salt in medium bowl to blend. Using electric mixer, beat 1 cup sugar and butter in large bowl until light and fluffy. Beat in eggs 1 at a time. Add grated lemon peel. Mix in dry ingredients alternately with milk. Pour batter into prepared loaf pan.
3. Bake until tester inserted into center of bread comes out clean, about 1 hour.
4. Meanwhile, combine remaining 1/2 cup sugar and fresh lemon juice in small heavy saucepan and stir over low heat until sugar dissolves.
5. Transfer lemon bread to rack. Gradually spoon lemon glaze over hot bread, adding more as glaze is absorbed. Cool lemon bread completely in pan on rack. (Can be prepared 1 day ahead. Turn bread out onto rack. Cover with plastic wrap and let stand at room temperature.)
Recipe courtesy of The Bon Appetit Fast Easy Fresh Cookbook
Sunday, October 05, 2008
The Family Cornbread
As soon as I ate the first spoonful of Heidi Swanson's Roasted Tomato Soup with Smoked Paprika, I knew I should've made something bready to go with it. Grilled cheese, maybe, or toasty garlic bread. It's not that the soup wasn't enjoyable; with its oven-roasted tomatoes, red bell pepper, onions and garlic, it was warm and comfy, with a little more depth than your typical tomato soup. But it needed a go-with.
Enter my grandfather's cornbread. Mulyatz, we call it--though that's the phonetic spelling, and when I asked Pop how it's really spelled, he wasn't quite sure. Mogliacci? Mogliazi? I'd never made it before, but remembered eating it as a child, when Pop would make it. His favorite way to eat it is alongside escarole and beans (as bread), or cut into small squares and served as a hot or cold appetizer. It's basically cornbread amped up with Italian sausage and Parmesan cheese. And what's not to like about that? Pop told me he got the recipe from his mother, who got it from her mother--and while cornbread and polenta are typically northern Italian specialties (and Pop's family is from Naples), this dish has nevertheless been part of our family repertoire for five generations.
Spoonful of soup, bite of mulyatz--now we're talking. I even broke off a few little bits of mulyatz and dunked them into the soup. Just delicious.--S
Mulyatz (cornbread)
1/2 lb Italian sausage
1 small onion
1-2 T olive oil
2 c yellow cornmeal
1/3 c Parmesan cheese
4 c water
Black pepper and salt
1. Grease 13"x9" baking dish with olive oil.
2. Dissolve cornmeal in 2 c cold water. Stir and set aside.
3. Remove casing from sausage, break up into pieces and saute with olive oil and chopped onions.
4. Bring 2 c water to a boil. Pour in the sausage and onions, then add cornmeal and water mixture. Stir constantly until very thick, then add cheese, pepper and salt.
5. Pour mixture into baking pan, spreading out evenly to about 1/2" thick. Let rest for 1/2 hour.
6. Preheat oven to 425. Rub a bit more olive oil on top of cornbread and bake for 1 hour or until crust forms on top.
Friday, September 26, 2008
Fennel and Garlic with Pork
The name of this recipe is Roasted Pork Tenderloin with Fennel Garlic, but I propose renaming it to focus on the fennel and garlic. Don't get me wrong. The pork is succulent and juicy, lightly scented with oregano, and very tasty. But the fennel and garlic? Amazing.
You toss 12 whole garlic cloves, peeled, and fennel bulbs that have been cut into eighths with olive oil, salt and pepper, and roast them for 10 minutes in a very hot (475) oven. After 10 minutes, you push the veggies to the side, making way for the tenderloin, which you've rubbed with oil and seasoned with oregano, salt and pepper, and put the sheet back in the oven for another 20 or 25 minutes.
Once the pork is done, you must let it rest for five or so minutes out of the oven, and while that's happening, I dare you not to pick a bit of roasted fennel off the pan for a taste. It's impossible. Fork and I hovered over the resting meat, nibbling at slivers of burnt fennel that had sweetened in the hot oven. And then there was the garlic: browned and crunchy on the outside, sweet-savory and yielding on the inside. It was like garlic candy. And yes, the pork was really good, too, but I'm seriously considering roasting up a pan of fennel and garlic tomorrow, they're that good.--S
Roasted Pork Tenderloin with Fennel and Garlic
12 garlic cloves, peeled
3 lbs fennel bulbs (I used 2 large), fronds and stalks removed, bulbs cored and cut into eighths
3 T olive oil
Coarse salt and ground pepper
2 pork tenderloins (about 1 lb each)
1/2 t dried oregano
1. Preheat oven to 475. On a large rimmed baking sheet, toss garlic, fennel, and 2 T oil; season with salt and pepper. Roast 10 minutes.
2. Rub pork with remaining T oil; season with oregano, salt and pepper. Remove baking sheet from oven, and push fennel and garlic to sides of sheet. Place pork in center, and roast 20 to 25 minutes, until an instant-read thermometer inserted in thickest part registers 145.
3. Transfer pork to a cutting board, and let rest at least 5 minutes before thinly slicing. Serve pork with fennel and garlic.
Recipe courtesy of Everyday Food
Thursday, September 25, 2008
What Should I Make Right Now?
We all know that corn and tomatoes are summer foods, and apples and squash are the highlights of fall. But what about March? What about December? And aren't you a little curious about what you're supposed to do with all those apples? Or what you can really do with grapes, aside from eat them out of hand? Enter this fabulous new seasonal ingredient map from the geniuses at Epicurious:
You can roll over each ingredient to see a recipe slideshow, ingredient description and cooking tips. And aside from the practical uses, it's also kind of fun to pick up random bits of info. For instance, in April, New York and Alaska actually have a lot in common: carrots and potatoes, to be exact. Enjoy!--S
Friday, September 19, 2008
Hold Onto Summer
With summer slipping through my fingers (60 degrees when I stepped outside to run this morning!), I resolved to get myself to the greenmarket this week and enjoy the still gorgeous produce. The tomatoes, especially, continue to look amazing, and when I saw a recipe for a Caramelized Tomato Tarte Tatin in Wednesday's paper, I knew I had to make it.
I somehow skipped over the "tatin" part when I first read the recipe. What really drew me in were the words "tomato" and "tart." (Incidentally, it was almost exactly a year ago that I discovered this magnificent tomato tart.) The ingredient list seemed perfectly reasonable--puff pastry, onions, sugar, sherry vinegar, olives, tomatoes and thyme--so I made a split-second decision to make it for dinner. Many farmers at the market were selling cherry tomatoes in gorgeous colors, and I asked one of the vendors if I could mix and match them. He thrust a plastic pint basket at me and said, "Go nuts." So I did, handpicking about a pound of red, orange, yellow and purple cherry and grape tomatoes.
And then I got home and read through the recipe--and realized this was a tarte tatin--French code word for "upside down." Riiiight! I've made plenty of apple tarte tatins, and actually love them for their rustic look and simplicity. And that's exactly what this tomato tarte tatin was. I caramelized thinly-sliced onions and set them in a bowl to cool. Then I made a caramel sauce in a nonstick skillet, added the tomatoes and olives, spread the onions on top, plus thyme, salt and pepper, and topped the whole thing with a round of puff pastry dough. Into a 425-degree oven it went, and about 20 minutes later it was golden brown. A quick (and you must do it quickly, there's no other way) flip over onto a plate, and we were ready to eat.
The tarte was both savory and sweet, dessert-y and dinner-y. We gobbled it up with a big green salad, and helped ourselves to seconds. The roasted tomatoes exploded in our mouths, the puff pastry crust slightly crunched, and we were happy to hold onto summer a little bit longer.--S
Wednesday, September 17, 2008
The Non Frittata
Lidia Bastianich's Frittata with Asparagus with Scallions is not exactly a frittata. But then, when you're Lidia Bastianich--the real doyenne of Italian cooking, as far as I'm concerned, whose recipes have never failed me--you can call a mess of gently scrambled eggs, lightly cooked asparagus, crisped up prosciutto and melted onions whatever you want.
In the recipe's introduction, Lidia explains, "This is a different sort of frittata, not the neat golden round of well-set eggs that's probably most familiar. Here the eggs are in the skillet for barely a minute, just long enough to gather in soft, loose folds, filled with morsels of asparagus and shreds of prosciutto." It's a pretty brilliant combination, actually, and who cares if it's a far cry from the perfectly pan-shaped version? My lackluster supermarket was out of scallions, so I used a large onion, which turned out fine. Next time, however, I will definitely use a nonstick skillet, as my stainless steel one is still showing evidence of the frittata-non-frittata (need to get my hands on some of this).
After being away from home for awhile, this was the perfect dinner: warm, homey and uncomplicated. I'm not going to turn my back on the traditional frittata, but I'll surely turn to Lidia's version again.--S
Frittata with Asparagus and Scallions/Frittata Asparagi e Scalogno
Serves 4 as a light meal or 6 as an appetizer
1 lb fresh, thin asparagus spears
4 oz prosciutto or bacon, thick slices with ample fat (about 4 slices)
1/2 lb scallions
3 T extra-virgin olive oil
1/2 t coarse sea salt or kosher salt, or more to taste
8 large eggs
Freshly ground black pepper to taste
1. Snap off the tough bottom stubs of the asparagus, peel the bottom few inches of each spear, and cut them crosswise in 1 1/2" pieces. Slice prosciutto or bacon into strips, or lardoons, about 1 inch long and 1/3" wide. Trim the scallions, and cut crosswise into 1" pieces.
2. Pour the olive oil into the skillet, scatter in the lardoons, and set over medium heat. When the strips are sizzling and rendering fat, toss in the cut asparagus, and roll and toss them over a few times. Cover the skillet, and cook, still over moderate heat, shaking the pan occasionally, until the asparagus is slightly softened, 5 minutes or so.
3. Scatter the scallion pieces in the pan, season with a couple pinches of salt, and toss the vegetables and lardoons together. Cover the skillet, and cook, shaking the pan and stirring occasionally, until the scallions and asparagus are soft and moist, 7 or 8 minutes more.
4. Meanwhile, beat the eggs thoroughly with the remaining salt and generous grinds of black pepper.
5. When the vegetables are steaming in their moisture, uncover the skillet, raise the heat, and cook, tossing, for a minute or so, until the water has evaporated and the asparagus and scallions seem about to color.
6. Quickly spread them out in the pan, and pour the eggs over at once. Immediately begin folding the eggs over with the spatula, clearing the sides and skillet bottom continuously, so the eggs flow and coagulate around the vegetables and lardoons.
7. When all the eggs are cooked in big soft curds—in barely a minute—take the skillet off the heat. Tumble the frittata over a few more times to keep it loose and moist. Spoon portions onto warm plates, and serve hot and steaming.
Recipe courtesy of Lidia's Italy
Wednesday, September 10, 2008
Buen Provecho on the Camino
A person can eat a lot over the course of a week of hiking up and down the mountains of northern Spain. And I'm not talking about trail mix. Last week, while my sis and I were covering about 140 miles of the famed Camino de Santiago from Hendaye, France, to Bilbao, Spain, we did consume our share of nuts, dried fruit, Babybel cheese and ham sandwiches. But at the end of the day, without fail, we rewarded ourselves and gave the local economy a boost by checking out the offerings at whatever bar we could find. And in Basque Country, the bar is often covered in food--specifically, pinxos, one-serving appetizers, eaten in a few bites, washed down with a glass of Rioja, a caña (glass of light beer) or, my personal favorite, the clara--a light beer mixed with lemon soda. Knowing we'd find refreshment and some sort of delicious food made lugging an 11-pound backpack through some tough terrain totally, totally worth it.--S
Note the beer teetering on the edge of the bar, to the left.
Most pinxos cost about 1,20 euros--sometimes more than a glass of beer.
These were in Lezama, at the town's annual fiesta. We ate while watching a wood-chopping contest and listening to a local band.
Cafe in Gernika.
Celebratory pinxos at the end of our journey, in Bilbao.
Basque doesn't seem to resemble Spanish at all--all those x's and k's. Thankfully there are usually Spanish translations. But even if you don't know what you're ordering, it's going to taste delicious.
Friday, August 29, 2008
My New BFF
I am delighted to introduce my (excuse me, OUR) latest kitchen toy: the KitchenAid Stand Mixer, Artisan Series with tilting head and direct drive transmission! (Excuse me while I bow.)
Fork and I received this awesome machine last weekend at a wedding shower, and it was the one item I insisted on bringing back to the City. Everything else can wait in my parents' basement, for now, anyway, but I was dying to clear off counter space for the mixer.
I gave it a whirl the other night, with Banana Chip Cookies. They're basically chocolate cookies with a little extra mixed in: chopped, toasted walnuts; and chopped dried banana chips. The recipe also calls for a touch of toasted wheat germ and whole wheat flour. The mixer handled everything like a pro, naturally, turning the butter light and fluffy in less than a minute, and incorporating the sugar with results that can only be described in the words of my grandfather: poetry in motion. Oh, and the cookies? Delicious.
As summer winds down and we head into fall, I can't wait to show the mixer some love. Just think of all the cakes, cookies, bread and whipped cream that await.--S
Thursday, August 21, 2008
Summer Love
So much for the dog days of summer. We've been having spectacular weather lately, with the morning temperature when I set foot outside for a run somewhere around 75. Skies are sunny and blue, and the humidity's low. Can we have this weather for a few more months, please? Oh, and while we're at it, can we continue to have the amazing fruits and vegetables currently on offer at the greenmarket?
I finished a six-miler yesterday at the market, and picked up a dozen or so plums from Miglorelli, the kind with rosy pink skin and yellowish flesh. They finished ripening while I was at work, and I when I got home, I set to work slicing them, then halving the slices. Into a square ceramic baking dish they went, tossed with a tiny bit of flour and brown sugar. In a separate bowl, I whisked rolled oats, brown sugar, flour and salt; then I cut in a cold stick of butter. I sprinkled the sugary, oaty, buttery crumbs over the fruit, forming a thick carpet, then baked it for 40 minutes. The smell was heavenly, and after the dish was bubbling and lightly browned, I took it out of the oven and let it cool by the window (nice touch, right? I was in a rush to get the thing uptown to book club).
Somehow the crisp made it safely 20 blocks north on the subway, and my friends and I enjoyed it, still warm. Sweet, a little tart, gently crunching from the oatmeal, kind of slurpy--this is August at its best.--S
Plum Oatmeal Crisp
serves 6
1/2 c plus 1 T all-purpose flour
1 c plus 2 T packed light-brown sugar
1/2 c old-fashioned rolled oats
1/4 t salt
1/2 c cold unsalted butter, cut into small pieces
2 1/2 lbs ripe plums, cut into 1-in. pieces
1. Preheat oven to 375. In a medium bowl, stir together 1/2 c flour, 1 c sugar, oats and salt. Using a pastry blender or two knives, cut in butter until coarse crumbs form.
2. In a shallow 2-qt baking dish, toss plums with remaining 2 T sugar and 1 T flour; sprinkle with oat topping. Place dish on a rimmed baking sheet. Bake until topping is golden brown, 40-45 min. Let cool 20 minutes before serving.
Tuesday, August 19, 2008
Clams by Another Name
After a lovely day at the beach on Sunday, Fork and I emerged from Penn Station wondering what to have for dinner. One look at the long taxi line on 7th Avenue was all we needed to convince us to walk home--via a route that took us past Garden of Eden.
We picked up two dozen Connecticut littleneck clams, some tomatoes, a cucumber, dill and a $1 bag of day-old bread. A stop at the wine shop for a chilled bottle of Albarino (our latest favorite, from Galicia and perfectly crisp) and we were set. On the agenda: the unfortunately-named Gwyneth's Clams. The recipe comes from a road trip Gwyneth Paltrow, Mario Batali and Mark Bittman took through Spain, documented in a TV series, forthcoming book and recent article in Food & Wine. Dirty jokes from Fork notwithstanding, we were kind of psyched to try Gwyneth's clams.
There's not much to the dish: well-scrubbed clams steam open in the wine, with a horizontally halved head of garlic and a couple of bay leaves. Drizzle the opened clams and wine broth with olive oil, and dinner's ready. Before preparing the clams--which took all of 10 minutes--I threw together a tomato/cucumber/dill salad, a classic summer salad my friend Anne taught me years ago.
It probably goes without saying that we wiped this out. The clams were delicious, and you tasted more of their ocean flavor since they were cooked in wine, not butter. Sopping up the broth with the bread (and rubbing it first on the halved garlic head floating around inside the wine) was very enjoyable, too. Aside from the name, this is one of my favorite dishes of the summer.--S
Friday, August 08, 2008
Herbal Delight
With the vegetable situation still verging on out-of-control, I threw down the gauntlet the other night. I was sitting on vast quantities of lettuce, green beans, red onion, and herbs (basil, cilantro and chives). This time my rescuer was dear Heidi Swanson, of 101 Cookbooks. Her Herb Salad was just the ticket to wipe out nearly all the veggies Fork's mom brought. Snow peas are all that remain.
Again, I wondered if this would be filling enough for dinner, and again, I was worrying about nothing. What gives this salad oomph is its rich dressing, made from avocado, Greek yogurt, lemon juice and garlic. It's heavenly. It pulled the whole dish--blanched green beans, corn, toasted pumpkin seeds, lots of fresh herbs, and red onion--together. And it gives it some substance. Oh, and did I mention it is delicious? In fact, I'd seriously consider making this dressing in lieu of guacamole, adding some jalapeno and perhaps lime juice instead of lemon. I'd say this recipe's star is the dressing, actually--though the fresh herbs are pretty fabulous, too. I rarely put herbs in salad, and this recipe reminded me how they add freshness and flavor to simple vegetables.
Make this one NOW. It's seasonal, and I really don't want you going without this amazing dressing any longer.--S
Tuesday, August 05, 2008
The Dish to the Rescue
Lately it feels like if I'm not making ice cream, I'm trying to figure out what to do with huge quantities of fresh vegetables. Not that either of these situations are a problem. But last night I was starting to panic about the number of bags of veggies in the fridge. Andrew's mom was down the weekend before last, and she brought a bounty from her garden. I roasted beets, baked zucchini bread, and ate the broccoli and green peppers--both so green they barely resembled the stuff they sell at Gristede's--raw with hummus. But still there remained yellow summer squash, more peppers and green beans. Salvation arrived yesterday, in the form of The Dish, Food & Wine's weekly e-mail. Subject line: "10+ Delicious August Vegetable Dishes." Yes.
Yellow Squash Soup with Scallion Salad is a delicious summer soup, hot but refreshing, with a nice tang from buttermilk. The presentation is lovely; you ladle the sweet, yellow pureed soup into bowls, scatter a "salad" of cooked and raw chopped veggies in the middle, and add a few bits of fried cheese to the side. I was nervous about this being filling enough for dinner, but both Fork and I were happily stuffed.
I made a few changes to the recipe, based on the veggies I had in my fridge. Instead of just grilling scallions, I added sliced onions, too. I subbed chopped blanched green beans and chopped green peppers for tomatoes and cucumber. And in place of tarragon and parsley, I used cilantro and chives. I did, however, stick with the recipe's suggestion for manchego in the "fricos," little fried cheese crisps. They added the perfect salty crunch. Yes, making this dish put a serious and much needed dent in the crisper drawer. But it also resulted in a great dinner and new summer soup to add to my repertoire.--S
Yellow Squash Soup with Scallion Salad
1 T unsalted butter
1 lb. small yellow squash, cut into 1-inch pieces
2 fresh bay leaves [I used one dried]
1 1/2 c low-sodium chicken broth
1 1/2 c water
6 scallions, white and tender green parts only
1 T plus 1 t extra-virgin olive oil
1 c buttermilk
Salt and freshly ground white pepper
3/4 c finely grated Manchego cheese (2 ounces)
1 c grape tomatoes, quartered
1 T minced tarragon
1 T minced flat-leaf parsley
1/4 c finely diced peeled cucumber
1 t lemon juice
1. In a saucepan, melt the butter. Add the yellow squash and bay leaves and cook over moderate heat for 8 minutes. Add the broth and water and bring to a boil. Simmer just until the squash is tender.
2. Meanwhile, preheat a grill pan. Rub the scallions with 1 teaspoon of the oil and grill over high heat, turning occasionally, until lightly charred, 5 minutes. Let cool, then cut into 1/2-inch pieces. Transfer to a bowl.
3. Transfer the squash and 1/2 cup of the broth to a blender and discard the bay leaves. [I left the squash in the pot, removed all but a 1/2 c of broth, and pureed it using an immersion blender.] Puree the soup and blend in the buttermilk. Season with salt and pepper. Keep warm or refrigerate until cold.
4. Heat a nonstick skillet over moderate heat. Spoon twelve 2-inch-wide mounds of the Manchego into the skillet; cook over moderate heat until browned on the bottom. Off the heat, flip the cheese crisps. Return to the heat and cook until browned. Transfer the crisps to a rack and let cool.
5. Add the tomatoes, tarragon, parsley, cucumber, lemon juice and the remaining 1 tablespoon of oil to the scallions and toss. Season the salad with salt and pepper. Ladle the soup into bowls and garnish with the scallion salad. Serve the soup warm or chilled with the cheese crisps.
Recipe courtesy of Food & Wine
Friday, August 01, 2008
When You Tire of Plain Old Ice Cream
Ice cream is all well and good, but an ice cream sandwich takes the pleasure up a notch. The nostalgia factor, the portability, and the combination of cookie and ice cream all add up to a refreshing break from a plain ol' bowl of ice cream. (Boooooring!)
My favorite homemade ice cream sandwiches (incidentally, the only ice cream sandwiches I've ever made) combine coconut and vanilla. They're Coconut Cream Sandwiches, and while the original recipe suggests you buy two pints of vanilla ice cream for the filling, would it really kill you to make a batch of homemade ice cream? No French-style, egg-based seriousness needed; a simple Philadelphia-style ice cream fits the bill just fine, especially since the cookie part of the ice cream sandwich is pretty rich, made with sweetened shredded coconut, butter, sugar, flour and salt.
You'll probably find the cookies expand in the oven--it happens to me every time--so shape the unbaked cookie dough into a smaller piece than you'd ideally want for an ice cream sandwich. And when the cookies have cooled and you're ready to make the sandwiches, make sure the ice cream is slightly softened, otherwise you'll break the cookies. And then you'll have to eat them on the spot.
It's August, summer's half over, and you're probably sick of ice cream. Okay, you're not sick of ice cream. I still recommend these ice cream sandwiches!--S
Coconut Cream Sandwiches
Makes 12
1/2 c unsalted butter, room temperature
1/2 c sugar
1/4 t salt
3/4 c all-purpose flour
7 oz sweetened shredded coconut
2 pints vanilla ice cream, slightly softened (recipe below)
1. With an electric mixer, beat butter, sugar and salt until smooth. Mix in flour, then coconut, beating until a dough forms. Transfer to a piece of waxed paper; pat into a rectangular log, about 3" wide and 6" long. Wrap with waxed paper; freeze until firm, about 30 min.
2. Preheat oven to 350, with racks in upper and lower thirds. With a serrated knife, slice log of dough crosswise 1/4" thick (you should have about 24 slices); arrange slices on two baking sheets. [Leave plenty of space between the cookies; as mentioned above, they will spread.]
3. Bake until golden, rotating sheets from top to bottom and front to back halfway through, 20 to 25 minutes (watch closely toward end of cooking time to avoid overbrowning). Cool completely on sheets.
4. Dividing evenly, spread ice cream on flat side of half the cookies; sandwich with remaining cookies, flat side down. Freeze on a baking sheet until firm, about 3 hrs. (To freeze longer, up to 1 week, wrap sandwiches individually in plastic.)
Recipe courtesy of Everyday Food
Wednesday, July 23, 2008
Cheesy Cracker
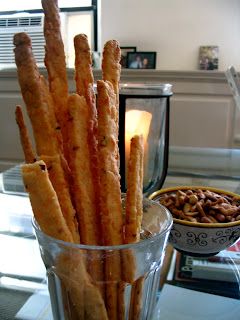
Next time you're cracking open a beer or uncorking a bottle of wine, forgo the cheese and crackers and turn your eye toward the magnificent hybrid known as the Cheese Straw. This classic aperitif accompaniment is easy to make and can be adjusted to taste. It goes equally well with a Yeungling or a glass of prosecco, and whets the appetite without filling you up. And I've always loved Cheese-Its, so these are slightly classier, homemade version. With some kick, especially if you're a little heavy with the red pepper flakes.
I got the recipe from Aunt Betty about five years ago, and it's been a workhorse ever since. A default finger food for when guests are coming over, since you can make them ahead of time, put them in a cute glass or lay them on a platter, and most everyone loves them. It's a simple recipe: combine cheddar, butter, flour, salt, red pepper flakes and half-and-half; roll the dough into a sheet; cut the dough into strips; bake. Ta-da. Cheese-Its for grown-ups.--S
Cheese Straws
4 oz extra-sharp Cheddar cheese, grated
4 T butter, softened and cut into 4 pieces
3/4 c. flour (more for rolling dough)
1/2 t salt
1 t crushed red pepper
1 T half-and-half
1. Heat oven to 350 degrees. In a food processor, combine cheese, butter, flour, salt and red pepper, and pulse until mixture resembles coarse crumbs. Add half-and-half, and process on low speed until dough forms a ball. [You might need to add more half-and-half; if so, do it little by little.]
2. On a lightly floured surface, using a lightly floured pin, roll dough to a rectangle 8 by 10" and 1/8" thick. With a sharp knife, cut dough laterally into thin strips, 1/4 to 1/3" wide. Gently transfer each "straw" to an ungreased cookie sheet, leaving a 1/4" space between them, and bake 17 minutes, or until the ends are barely browned. Let cool.
Yield: About 30 straws.
Recipe courtesy of the New York Times
Thursday, July 17, 2008
We'll Be Back...
Let's call this a dry run. After giving a coveted three-spork review to Bar Stuzzichini with one hand, and slapping it around with the other, Spoon and I were excited for dinner with friends Cara and Bryan, at newcomer Lunetta, just half a block away from Bar Stuzzichini. We had a lovely evening. We especially enjoyed the company, and there were some culinary highlights. Still, this new Flatiron neighbor kind of fell flat. But, hey, how fair is it to rate a restaurant after just one meal, and after just a few months in business? So no sporks, this time Lunetta, but next time you see us coming, you better...
Lunetta is situated in the space occupied by the old Mayrose Diner, and it comes to us already having achieved a following in Brooklyn, one of the more respected establishments on Smith Street. Note to Chef Adam Shepard: this ain't Brooklyn. You have Bar Stuzzichini within sight, Georgio's and Pizza Fresca around the corner, Beppe and Novita a block away, and the class of the group, A Voce, just six short blocks away. You have time to work out the kinks, chef, but not much.
Let's start with the highlights: the bruschette were tops. We went with the ricotta, hazelnut and lemon zest, and it was sensational. We also had a nice bottle of wine, a sangiovese, from their very reasonably-priced list, and we were ably helped in our selection by the sommelier.
It was hit or miss after that. We went with a tentacled theme to start. The fried calamari, was, well, fried calamari. It's good at Hooters, too, so, you know, whatever. The octopus came served with a Mediterranean flair, on a bed of cucumber, and, frankly, it was abysmal. Cold, rubbery, discolored, and a bit fishy, about as far from the always perfectly cooked octopus served steps away at Bar Stuzzichini.
The main courses were delicious, if inconsistent. My tagliatelle with pork and short rib ragu was fantastic. Perfectly cooked, and seasoned, generously portioned, and with great texture. Meanwhile, with half a dish of my pasta to go, I noticed Spoon's linguine with clams was wiped out. For the record, I rarely see Spoon clean a plate, and never before I do. There couldn't have been more than a fistful of pasta in the bowl. She said it also lacked linguine with clams's signature garlicky punch. Bryan had the meatballs (pictured), also delicious, but served alone in a white bowl, and not quite a filling meal. Cara, meanwhile, enjoyed a nice, simple pomodoro. For dessert, a hazelnut gelato was decadent, while an olive oil gelato was passable, though unremarkable, rather like eating vanilla gelato with an oil-soaked spoon.
The service, while enthusiastic, was also spotty. It was somewhat jarring that our perfectly nice, cheery and tall (at least 6'4") server seemed to have his own hobbit, training a 4'11" comrade who did not speak. When I asked the waiter if the antipasti were individually portioned or suitable for sharing, he replied, "Yes!" enthusiastically. Um, oooookay.... When Bryan ordered the meatballs, he failed to explain that they were served alone. He asked if Bryan wanted a side order of pasta, but he really should have recommended it.
Spoon and I were split over the room itself. Spoon liked the decor, and I agree, it is pretty: high ceilings, all windows on the outer walls with nice drapes, and mirrors on the inner walls. The tables are marble, and we were seated in a comfortable banquette. To me, however, it lacked the gravitas of Bar Stuzzichini's heavy, deep wood and hanging lamps. The decor seemed like it could be disassembled in a day's time. Which it very well might be if Lunetta doesn't do something soon to distinguish itself in a neighborhood already packed with good Italian.
Adam Shepard is clearly a very talented chef. He also is apparently up for a challenge, moving into a neighborhood with so much competition. We're hoping he's up to that challenge. Time, and a few more meals, will surely tell.--F
Saturday, July 12, 2008
Tapas, Italian Style
BAR STUZZICHINI
928 Broadway, at 22nd Street
(212) 780-5100
THREE SPORKS
Sometimes, it's hard to tell the one you love how you really feel. No, not Spoon, and no, not the delightful Bittman sisters, with whom we enjoyed a fun meal Friday evening. For months now, however, we've been meaning to do a proper review of Bar Stuzzichini, one of Spoon & Fork's favorite new spots and a welcome addition to the Flatiron's already brimming culinary wellspring. After dozens of meals over the past year, sampling virtually everything on the menu, and a good chunk of the wine list, well, it's time to get some things off our chest.
When it opened in June 2007, Bar Stuzzichini offered a refreshing proposition, different from the "family style" meals associated with so many Italian restaurants. Its specialty is rustic "stuzzichini," small plates, not unlike tapas, with each plate offering a few bites, ranging from $5 and $10 per, or, the house deal of any combination of five plates for $22 (for two people), or $40 (for four to six people). A nice selection of entrees are served sparely as well, without sides or garnish, alone on white plates.
It's a lovely way to eat, Spoon and I agree. Over the course of a meal, one can enjoy many flavors and textures. It's visually appealing, too, if tough on the dishwashers. You can really appreciate the richness of Italian cuisine when it lays in front of you, simply presented, on small plates, unspoiled by a careless side dish. The wine list, meanwhile, is outstanding, mostly Italian vintages, particularly southern Italian, available by the bottle, glass and "quartino," a beaker-like vessel that holds about two glasses. For me, however, it's hard not to go with an ice-cold Peroni, served in a tall glass. They also prepare a perfect cocktail at the bar, for those unpersuaded by the wine list. The room is nice, lots of wood, with an elegant banquette, illuminated by hanging wagon-wheel lamps, although Frank Bruni's one-star review called the restaurant's opaque light "unflattering."
By now, Spoon and I have our favorites: a typical meal for us includes a fantastic grilled octopus; scamorza, a fried, spiced piece of aged cheese that's a mouthwatering must; grilled prawns, served with the head on; clams presented in a garlicky broth, ideal for sopping up with fresh-baked bread; and a plate of crisp green olives. For entrees, the restaurant serves the best braciole (pictured) outside of your Nonna's kitchen. Spoon has been addicted to the orechiette with cauliflower and bread crumbs since the beginning, though lately the crispy lemon chicken has taken a toe-hold. Other offerings include an excellent bone-in rib-eye steak served with a little spice, a decent rabbit, and striped bass cooked in parchment paper.
Friday's meal, aside from the exceptional company, was fairly typical. Yet Spoon and I both left the restaurant with a feeling that perhaps all is not quite right in Bar Stuzzichini's world. To start, the service was lackluster, and over the past year has been very hit-or-miss. One meal, a server may be very well-engaged, others, barely present. On Friday, it was the latter. I never received a second Peroni (though it showed up on the bill), despite repeated efforts to flag down our waiter in the hardly busy room. We ordered stuzzichini for four, and four of the dishes were appropriately doubled in size, except for the olives: there was only one small dish instead of two. Only one basket of bread, too, and the end piece I had was stale and chewy. Erratic service can be overcome or at least tolerated in some restaurants, but not at Bar Stuzzichini, where ordering and enjoying the menu requires a certain level of engagement from the server.
Of general concern, after more than a year the restaurant has not changed its menu, and there are no specials. For regulars like us, it is beginning to seem like the formula is set and that's it. In fairness, we usually have our meal plotted out before we walk in. But it's beginning to feel like Bar Stuzzichini isn't trying. Why not offer some seasonal specials? Serving small plates of stuzzichini surely offers an excellent opportunity to branch out, especially considering the restaurant is just six short blocks from the Union Square Green Market.
Judging from the dwindling number of diners, we're not alone in our assessment. When we left at 9:30 on Friday night, the restaurant was less than half-full. It could be that we were between seatings, or that numbers tend to fizzle in summer, when patrons leave town. Nevertheless, Bar Stuzzichini, which was packed front-to-back for months following its opening, is less and less so. On a recent Sunday night, we were virtually alone dining in the bar room. That scares us a little, and we have to wonder if the novelty of "Italian tapas" has worn off for newcomers, if the regulars are getting bored, and if those on the fence have been knocked off by the inconsistent service.
If Bar Stuzzichini needs a cautionary tale, it needs only to look around the corner (ahem, Rocco, Banana and Caviar, and now Borough). While Bar Stuzzichini is a far cry from Jeffery Chodorow's brand of hubris, it has made some questionable choices of late, most recently the addition of sidewalk seating. Situated along a treeless stretch of battered pavement that features a bus route, a view of the road construction just a block away, and a subway grate, it offers all the allure of picnicing in a parking lot. We recommend the bar room, as it is generally more festive than the back room, less grimy than the sidewalk, and the service tends to be better.
Despite the restaurant's inconsistency, we still recommend Bar Stuzzichini. Even when it slips, it manages to deliver at a fairly high level. Last night, however, I asked Spoon if we would be such regular patrons if the restaurant was, say, across town, rather than a few steps from our door. The honest answer: probably not. That's too bad. Bar Stuzzichini burst on the Flatiron scene a little over a year ago, and it earned both our business and its considerable buzz. Lately, though, it seems to be coasting, and in a neighborhood brimming with esteemed restaurant competition, including a lot of consistently solid Italian, from newcomer Lunetta, to staples like Beppe, Novita, Georgio's, and Pizza Fresca, there is never time to coast.--F
Subscribe to:
Posts (Atom)