Showing posts with label pork. Show all posts

Monday, May 10, 2010

The Ragu That Got Me Talking

This whole parenting + full-time job + getting back to running, friends, and life is... well, suffice it to say, I haven't figured out how to also keep up with this blog. It isn't that I haven't been in the kitchen: lately I've made some delicious blondies, awesome cupcakes, tasty zucchini pancakes, and a perfect roast chicken (if I do say so myself). It's just that I've been lazy about telling people about them.

But I'm ready to break the silence. What did it? A bolognese sauce with homemade pappardelle. Wide, chewy, eggy noodles tangled onto a plate with a rich, meaty sauce that's just the slightest bit sweet... this, I had to share. I grew up making my mom's marinara sauce, a champion workhorse in its own right. But I'd never made bolognese. I always thought it was too complicated for me. The truth is, it isn't really complicated at all. So long as you can stay home for at least four hours--which isn't so hard when you have a three-month-old baby to cuddle--it's quite simple.
You start by sauteeing some cubed pancetta, and then adding diced carrots, celery and onion. Next, you stir in ground pork and veal. Once the meats are cooked, in go tomato paste, a cup of white wine, milk, thyme, pureed tomatoes, a bay leaf, and chicken stock. Then, for the next three and a half hours, you basically let the sauce slowly simmer down to a thick and chunky consistency, like "loose chili," as the recipe says. I let the sauce cool completely and then froze it for about six days, until we ate it last night.

I'm sure the bolognese would've been great with fresh pasta from any one of our local purveyors, but since I was just bumming around on Sunday afternoon, I decided to make homemade pappardelle from Lidia's Italy. I had all the ingredients, and Lidia's pastas are usually superb. This one was no exception. Sure, the noodles were a little raggedy because I didn't make each ribbon a perfect rectangle. But I like to think their homemade look was more authentic than anything you could buy in a store.
Homemade pasta with bolognese sauce: I can't think of a better reason to get back in touch.--S
Bolognese Sauce
Makes 8 cups
For soffritto
2 T unsalted butter
2 T extra-virgin olive oil
3 oz pancetta, cut into 1/4" pieces
2/3 c minced yellow onion
2/3 c minced carrot
2/3 c minced celery
For sauce
1 lb ground veal
1 lb ground pork
3 T plus 1 t tomato paste
1 c dry white wine
1 1/4 c whole milk (I used a combination of 1% and half & half)
6-7 c chicken stock
1 can (28 oz) whole peeled tomatoes, pureed (w/juice) in blender
1 dried bay leaf
5 sprigs thyme
Coarse salt and freshly ground pepper
1. Cook soffritto: Heat butter and oil in large pot over medium-high heat until butter starts to sizzle, then reduce heat to medium. Add pancetta, and cook until golden and fat has rendered, about 2 1/2 minutes. Add onion, carrot, and celery and cook, stirring often, until just beginning to brown around edges, about 10 minutes (adjust heat if mixture is browning too quickly).
2. Brown meat: Add veal and pork and cook over medium heat, stirring frequently and separating meat with the back of a wooden spoon, until no longer pink, 8 to 10 minutes. once meat is completely browned, pour off any excess fat. Add tomato paste and cook 1 minute, stirring to intensify sweetness.
3. Deglaze pot and add liquids: Pour in wine and cook, stirring to scrape up browned bits from bottom of pot, until liquid has evaporated, 6 to 7 minutes. Add 1 cup milk and cook until reduced by half, about 3 minutes (don't worry if it appears slightly curdled, it will smooth out again). Add thyme bundle, then pour in 6 cups stock. Add tomatoes and bay leaf, and season with 1 1/2 t salt and 1/4 t pepper.
4. Simmer the sauce: Bring to a boil, then reduce heat to a very low simmer and cook, partially covered, 3 to 3 1/2 hours, skimming the fat from the surface with a ladle periodically. If at any time the sauce appears too dry, add up to 1 cup more stock as necessary. The finished sauce should have the consistency of a loose chili. Stir in remaining 1/4 c milk and season with salt and pepper, as desired. If not serving immediately, let cool completely before transferring to airtight containers. Refrigerate up to 3 days or freeze up to 3 months; defrost in the refrigerator before using.
Recipe courtesy of Martha Stewart's Cooking School
Fresh Pasta for Pappardelle
Makes 1 pound
2 c all-purpose flour
1 large egg
2 egg yolks
4 T extra-virgin olive oil
Ice water as needed
1. Put the flour in the bowl of the food processor and process for a few seconds to aerate. Mix the egg, egg yolks, and olive oil in a measuring cup or other spouted container.
2. With the machine running, pour the liquids quickly through the feed tube on top of the flour. After 20 seconds, most of the dough should clump up on the blade. Process for another 15 seconds or so--no more than 40 seconds total. (If the dough does not gather on the blade and process easily, it is too wet or too dry. Feel the dough, then work in either more flour or some ice water, in small amounts, using the machine or kneading by hand.)
3. Turn the dough out on a lightly floured surface and knead it by hand for a minute, until it's smooth, soft, and stretchy. Press it into a disk, wrap well in plastic wrap, and let it rest at room temperature for 1/2 hour.
4. To roll out the dough in a pasta machine, cut the pound of dough into four equal pieces. Work with one at a time, keeping the others covered. Run the first piece of dough through the rollers at the widest setting several times, to develop strength and smoothness. Repeat with all the pieces. Reset the machine to a narrower setting, and run the first piece through, extending it into a rectangular strip. Let the rollers move the dough, and catch it in your hand as it comes out. Roll it again, to stretch and widen it. Lightly flour and cover the strip, then stretch the other pieces.
5. Roll and stretch all the pieces at progressively narrower settings, until they spread as wide as the rollers (usually about 5") and stretch to 20" or longer. Cut the four long pasta strips in half crosswise, giving you eight sheets, each about a foot long and 5" wide. Lay these flat on the trays in layers, lightly floured, separated, and covered by towels.
6. Lay out a rolled sheet on the floured board; dust the top with flour. Starting at one of the short ends, fold the sheet over on itself in thirds or quarters, creating a small rectangle with three or four layers of pasta.
7. With a sharp knife, cut cleanly through the folded dough crosswise, into 2"-wide strips. Separate and unfold the strips, shaking them into long needles. Sprinkle them liberally with flour so they don't stick together. Fold, cut, and unfurl all the rolled psata sheets this way and spread them out on a floured tray. Leave them uncovered, to air-dry at room temperature, until ready to cook.
8. Cook in salted boiling water 2-3 minutes.
Recipe courtesy of Lidia's Italy

Saturday, January 23, 2010

Banh Mi: The New Black

Though they aren't quite as ubiquitous as pretzels and hot dogs, banh mi are apparently well on their way to taking over New York City. I first tasted one of these Vietnamese sandwiches--at their most basic, they consist of chicken, pork or even pate; pickled, shredded vegetables; spicy mayo; and sprigs of cilantro; all on a crusty baguette--about three years ago at Bao Noodles. Then my coworkers introduced me to Baoguette. And now I'm here to tell you about a twist on the banh mi that you can easily make at home.

If banh mi are supposedly a French-Vietnamese hybrid, then the Pork Meatball Banh Mi is an Italian-French-Vietnamese hybrid, taking the meatball sub in a very interesting (and delicious) direction. This recipe, from Bon Appetit, has you combine ground pork with chopped basil, garlic, scallions, fish sauce, chili sauce, sugar, salt and pepper (plus a sprinkling of cornstarch, presumably to help hold everything together). You form the meat into small-ish balls and fry them in a tablespoon of Asian sesame oil until they're nice and brown.

Before all that, however, you've already grated some carrots and daikon (or just use regular radishes if you can't find daikon) and set them to pickle in rice wine vinegar, sugar and salt for an hour or so. And you've whipped regular mayo into a deliciously spicy concoction with hot chili sauce and scallions.

Slice open a baguette (and here's where I think I could've used some foresight: the Eli's Bread baguette I bought was a bit too crusty; next time I'll go for a softer loaf), and pile on some meatballs, veggies and mayo. Tuck a few stems of cilantro in there, and maybe some sliced cucumber or jalapeno pepper, if you're so inclined. The combo of sweet, spicy, hot and cool is excellent. Bring on the banh mi boom!--S

Monday, January 04, 2010

Soup's On

Blustery weather and quiet January weekends call for long-simmered, warm dishes—and Pasta and Bean Soup from a new book called The Best Soups in the World (sounds suspiciously Bittman-esque, no?) by Clifford A. Wright—is just the thing. It's a twist on Italian pasta e fagioli, with white beans and small bits of macaroni joining forces with pork stew meat (I used shoulder), pancetta, fennel, chickpeas and, interestingly, a cinnamon stick.

I've been trying to plan ahead (what with Spork Jr. on the way) and have been doubling recipes when possible, so Fork and I can eat one dinner and freeze another one for later this winter when we're not so inclined to shop for food, never mind cook it. This one fit the bill perfectly, and there's already a solid quart of it in our freezer. It really is tasty, with a deeper and richer flavor than your average pasta and bean soup.

If you make this soup (and I highly recommend you do), plan on cooking it much longer than the recommended 1¼ hours—it took at least three hours for the dried cannelli beans I used (which hadn't been pre-soaked) to cook fully—and you'll probably wind up using an additional two to four cups of stock. But when it's 20 degrees outside (and "feels like 8"), few things are more comforting.

Pasta and Bean Soup

Makes 6 to 8 servings

3 tablespoons extra-virgin olive oil
1 pound pork stew meat, diced
¼ pound pancetta, cut into strips
¼ pound prosciutto skin, whole or cut into strips (optional)
1 large onion, chopped
1 fennel bulb (about ¾ pound), chopped
1 celery stalk, chopped
6 garlic cloves, chopped
10 cups chicken broth
1½ cups (about 10 ounces) dried white beans
1 cup (1/2 pound) canned chickpeas
¼ pound Parmesan crusts (optional)
1 cinnamon stick
1 bay leaf
1 sprig fresh rosemary
Salt and freshly ground black pepper to taste
¼ pound tubetti, ditali, or other short tubular macaroni
Extra-virgin olive oil for drizzling
Freshly grated Parmesan cheese for sprinkling

1. In a large pot, heat the olive oil over medium-high heat, then add the pork, pancetta, and prosciutto skin, if using, and cook, stirring, until they turn color, about 5 minutes. Add the onion, fennel, celery, and garlic and cook, stirring occasionally, until softened, 12 to 15 minutes.
2. Add the chicken broth, white beans, chickpeas, Parmesan crusts, if using, cinnamon stick, bay leaf, and rosemary, bring to a boil over high heat, then reduce to medium-low, season with salt and pepper, and cook until the white beans are al dente, about 1¼ hours. Add the pasta and cook, stirring, until they, too, are al dente, 12 to 15 minutes. Remove and discard the cinnamon stick, bay leaf, and rosemary sprig. Both the prosciutto skin and Parmesan crusts can be eaten if desired. Serve with a drizzle of olive oil and the grated Parmesan cheese.

Monday, November 23, 2009

Spoon and Fork Take a Break, The Quest for Good Food Continues...

We interrupt your regularly scheduled Spoon + Fork blogging to bring you this special announcement: Spoon finds herself a bit busy organizing onesies, mapping out baby furniture, figuring out how to collapse this bad boy, and prepping the world for the arrival of blueberry (oh, and she looks fab doing it). And fork? Fork is battling some unfortunate jetlag after flying to South Korea to enlighten Asian bibliophiles with his immeasurable knowledge of the future of the publishing industry . Call him Chop Sticks for now. Forks are out. Chop sticks are in.

Luckily, two of S+F’s inner circle of food aficionados have taken over for the week, because you, dear reader, have been deprived since Spoon’s last post about those decadent hazelnut and chocolate buns. Enter your guest bloggers: Fillet Knife and Butcher Twine. Yes, two very underrated kitchen utensils, ones that you may own, but that are probably relegated to that lower utensil drawer amongst the Krustbuster and Bacon Genie. Yet, when it comes to the highfalutin chops of one Julia Child, these two tools should be deemed indispensable.


A little background info so you know we’re legit:


Fillet Knife and Butcher Twine (FK and BT) grew up down the block from each other. They were in the same class from kindergarten through high school, were known throughout Northeastern New Jersey for their tennis court managerial skills, and even battled each other in the annual Gingerbread Throwdown Invitational, in which BT once made a highly impressive gingerbread Parthenon and FK (along with Spoon) showed off a stirring rendition of a gingerbread tiki hut. But we digress...


One night over Checker Cabs at the neighborhood fave Almond, FK and BT discussed the recent Julie and Julia film starring Meryl Streep and Amy Adams.

“I mean, did you see that duck? That thing was crazy. Stuffed with all that….stuff….and then wrapped in dough?,” pondered FK.

“I don’t think it’s that hard,” commented BT, “I mean, I bet we could do it”.


Keep in mind neither of us owns Mastering the Art of French Cooking (for shame!), nor has either ever attempted such a feat. We’re fans of simpler, dare we say, healthier alternatives. Never ones to turn down a challenge, however, we hatched our plan.


Pâté de Canard en Croûte, is what you’d call Duck, Stuffed with Pork, Veal, Pork Fat and Then Wrapped Up in Pastry Dough in the vernacular. (Sounds prettier – and less caloric - in French, doesn’t it?)


We won’t bore you with the details, but here’s the basic synopsis of how this all went down.


1. BT expertly put together the dough ahead of time. While doing so, BT realized two things. First, Julia Child’s cookbook predates the days of Kitchen Aid mixers. And second, that Julia seemingly forgot to say when to put the eggs in the recipe. Luckily, BT inherited his mother’s baking / pastry skills and was able to correctly guess when they needed to be added to the dough.

2. FK assembled the stuffing – veal/pork/salt pork (cured pork fat), eggs, spices, and a marsala/port reduction with butter and chopped onion. (cue the music).


The reduction made FK smile and think of one of Julia’s best-known lines, “I love cooking with wine—sometimes I even put it in the food.”


These two steps, if ever you decide to make this dish, are best done ahead of time. Consider them your mise en place. That way, you'll feel like a Top Chef, and Tom Colicchio can tell you that your flavor profiles are spot on, you'll win a billion dollars and enough Glad plastic wrap to last you a lifetime. Since this recipe takes up a good five or six pages in the original Mastering… know that it’s a long process, and might take 4-5 hours in all.


FK and BT got together on a rainy Saturday night with the recipe, tools, and ingredients necessary. They brought their A game. Parched before they even began, BT poured a few glasses of wine.


The first step of this recipe has you bone the duck. We took Donald (a 5-pounder from the renowned Otomanelli Brothers) out of his packaging (note the funny “I’m gonna carve myself up now!” logo below)


...and began the dissection dismemberment butchering.


Using a very sharp fillet knife, FK and BT skillfully carved down the backbone and along the rib cage, marveling at how easily the breast meat fell away from the bone. And heavens, what fat! Those ducks obviously haven't heard of heart-healthy eating.


Navigating our way through the wing and thigh joints, however, was a bit tricky. “When you come to the ball joints connecting the wings and the second joints to the carcass, sever them,” says Julia.


But on which side? Perplexed, we decided to wing it (pun intended), and using some nifty kitchen shears, cut the joints down the middle.


Pretty confident and proud of ourselves, we scanned over the recipe and chuckled at our favorite line of the night, “By the time you have completed half of this, the carcass frame, dangling legs, wings and skin will appear to be an unrecognizable mass of confusion and you will wonder how in the world any sense can be made of it all.”


Oh Julia, you have such a way with words.


The following conversation ensued:

BT: This whole butchering thing isn’t all that hard.

FK: (carving here, trimming there) Top off that wine glass and let’s figure out how to take the cavity out of the bird. Eww, this is so gross.

BT: I think we need to be extra careful when cutting between the skin and the breastbone. Julia says the skin is very thin and can be easily slit.

FK: I’m sure we can figure it…oh…yeah…I see…she’s right. Hmm. I don’t really know how we can cut it out without cutting some of the skin.

BT: Well, I think we already botched it when we cut a few holes in the skin to remove the wings, so we’ll just wrap it in extra twine.


Relieved, duck cavity removed (along with the bag of undesirable organ meats, the neck, and God knows what else…), we threw it in a bowl and set it aside (looks scrumptious, doesn’t it?!)


FK brought out the stuffing and BT took over, chopping up some of the breast meat we had removed, and mixed it with yet more marsala, port, salt, pepper, etc. (We think at this point, you could veer from the original recipe and add any type of herbs you like, chopped mushrooms, perhaps, even some toasted breadcrumbs if you wanted to make it less dense).

We amassed the, um, mass, and molded it into a meatloaf-shaped pile inside the duck. So far, so good. Protein inside protein inside pastry. What could go wrong?


Here is the point at which we realized a few important details:

a) our duck was bigger than the one in the recipe, thus making it heavier, and all around bulkier (balkier? No, bulkier).

b) we had a few unfortunate holes, which allowed the stuffing to kinda peek out.

But we're quick. We know the drill, so we wrapped the heck out of our duck with a lot of twine, and instead of browning it in a frying pan (maybe a paella pan would've worked, but alas, we were without one), we put it on a baking sheet and stuck it under the broiler for a few minutes, getting a little crispiness to appear on each side.


Once out of the oven, we let it cool, and BT rolled out 2/3 of the chilled dough, which we then wrapped around the bottom portion of the duck. It came up pretty far, and kinda looked like a papoose (not to be confused with capital P Papoose).


The top third was rolled out and put on top.

At this point, we were tired, but having a good time. Julia, always the consummate connoisseur of the kitchen, suggested we use the leftover dough to cut out some pretty flowers. The explanation and accompanying pictures took up almost an entire page. We decided instead to adorn our pièce de résistance with our real life initials.


The masterpiece went into the oven on a rack over a pan (enough fat oozed out to fill 1/2 coffee can. Nice!) for about 2 1/2 hours. We let the meat cool for over an hour (during which time, steam poured out of the steam hole we had put on top of the duck (per Julia) at a ferocious speed.)


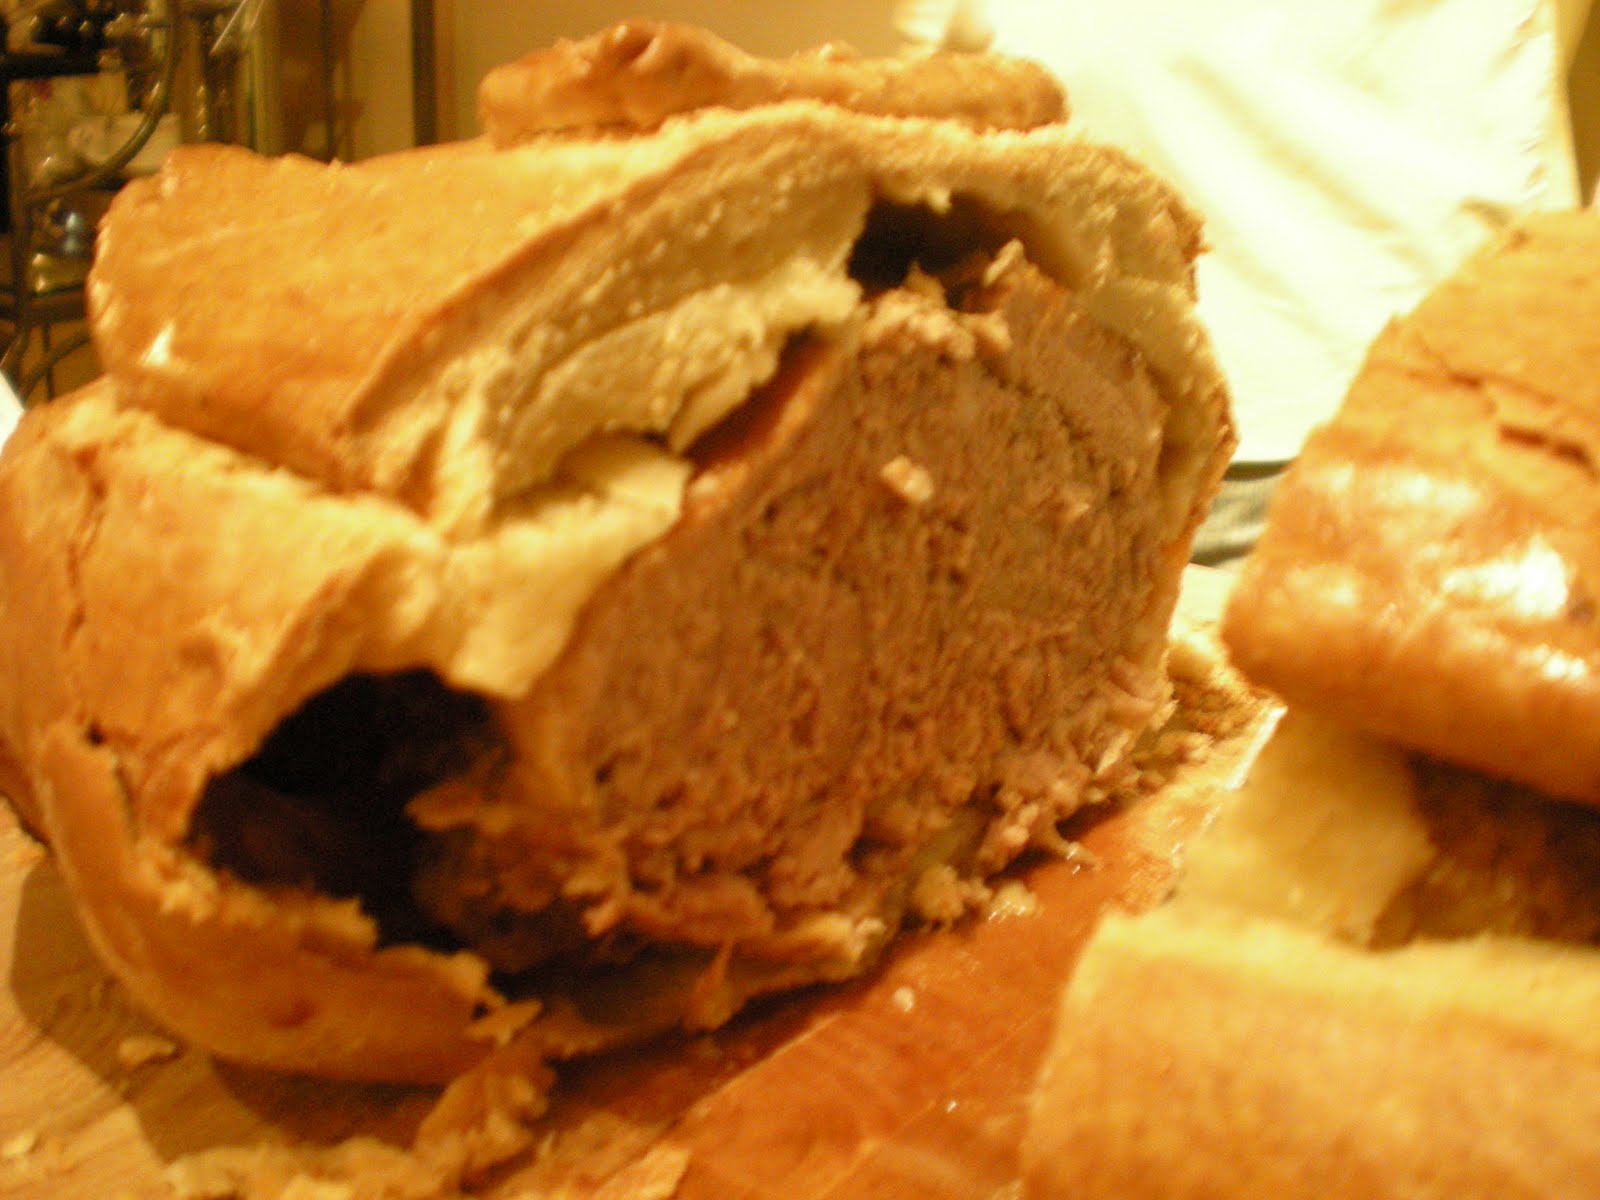
Thankfully, one very kind soul joined us for a taste. And guess what! It wasn't all that bad. It reminded FK of a very meaty, sumptuous calzone. BT thought it was similar to a fancy meatloaf wrapped in pastry dough (and since BT is a meatloaf fan, that is a compliment). The dough was crunchy on the outside, (shiny from an egg wash) hiding moist stuffing inside.


The real gem, though, was the back of the duck, the tender pieces of thigh that were hidden under layers of flaky pastry, surrounded by the stuffing.


Would you whip this up on a Tuesday night? Probably not. Was it worth the 4+ hours of work? Possibly.


Did it inspire us to try a turducken? Oh yes. But it's definitely tastier than its Tex-Mex successors, the Cheesy Gordita Crunch Supreme or whatever it is they serve over at Taco Town these days.